Hoe vervang ik de Batterijen van een Oral-B AdvancePower DB4010 Elektrische Tandenborstel?

Elektrisch poetsen
Tandartsen gaan er vanuit dat elektrisch poetsen beter is dan poetsen met een gewone handtandenborstel. Als je je tanden poetst met een elektrische borstel, maak je met één poetsbeurt net zoveel poetsbewegingen als met een handtandenborstel in een maand. Hierdoor haal je met een elektrische borstel dus ook veel meer tandplak weg dan met een gewone tandenborstel. En hoe meer tandplak je weghaalt, hoe minder kans je loopt dat het verkalkt tot tandsteen. Je voorkomt hiermee gaatjes of ontstoken tandvlees.

Als je handmatig poetst, heb je bovendien kans dat je te hard poetst. Dit is schadelijk voor je tandvlees. Je tandvlees kan zich gaan terugtrekken, waardoor je tandbeen bloot komt te liggen. Dit vergroot de kans op ontstekingen die leiden tot parodontitis. De kleine, vaak ronde kop van een elektrische borstel zorgt er bovendien voor dat ook lastig bereikbare plekken in het gebit beter schoon worden gehouden.

Vanuit tandheelkundig oogpunt heeft elektrisch poetsen eigenlijk geen nadelen. Sommige mensen vinden het trillen van de borstel, of het geluid ervan niet prettig, maar vaak is dat een kwestie van wennen. Gewone handtandenborstels zijn wel veel goedkoper dan elektrische borstels. Daarnaast zijn elektrische tandenborstels slecht voor het milieu.

Milieuaspecten
Bijna alle oplaadbare tandenborstels hebben een plastic behuizing en hebben ingebouwde, niet verwisselbare oplaadbare batterijen of een niet verwisselbare ingebouwde lithium-ion-accu. De ingebouwde batterijen in een elektrische tandenborstel hebben echter niet het eeuwig leven. Afhankelijk van de kwaliteit van de batterijen en het gebruik ervan, zullen deze na een X-aantal malen opladen toch versleten zijn. Omdat het meestal zonder ingewikkelde handgrepen niet mogelijk is de tandenborstel te openen en de batterijen te vervangen, worden er jaarlijks miljoenen elektrische tandenborstels in zijn geheel weggegooid.

Op YouTube zijn er wel handleidingen te vinden met behulp waarvan elektrische tandenborstels wel te openen zouden zijn. Deze methodes werken echter lang niet bij alle borstels. Als het je al lukt de behuizing zonder beschadigingen te openen, dan ben je nog niet klaar. De batterijen zitten namelijk vastgesoldeerd in het apparaat. Naast de juiste nieuwe oplaadbare batterijen heb je dus ook soldeervaardigheden nodig, een soldeerbout en soldeertin.

Wij hebben de proef op de som genomen en geprobeerd een elektrische tandenborstel van een drogisterijketen zonder schade te openen met behulp van YouTube handleidingen. Dit is niet gelukt. Uiteindelijk hebben wij de batterijen – die na 7 maanden al niet meer wilden opladen – met geweld moeten verwijderen met behulp van een ijzerzaag! Op deze manier worden consumenten bijna gedwongen elektrische tandenborstels weg te gooien. Het lijkt er op dat fabrikanten van elektrische tandenborstels er belang bij hebben dat hun apparaten worden weggegooid. Immers als mensen hun tandenborstel weggooien, zullen ze meestal weer een nieuwe kopen.

Elektrische tandenborstels met verwisselbare batterijen
Het ligt voor de hand dat er vraag is naar elektrische tandenborstels met verwisselbare batterijen. Waarom zou je immers je favoriete tandenborstel weggooien als deze nog helemaal goed is, inclusief de behuizing en het motortje? Weggooien is zonde, slecht voor je portemonnee en voor het milieu. Vreemd genoeg zijn elektrische tandenborstels met verwisselbare batterijen nauwelijks te vinden.

Oral-B AdvancePower DB4010
Na enig zoekwerk op Internet hebben wij uiteindelijk wel een elektrische tandenborstel gevonden met verwisselbare standaard AA (Penlite) batterijen, van het bekende merk Oral-B. Elektrische tandenborstels van Oral-B bestaan al sinds 1987. Het lijkt er een beetje op, dat de Oral-B AdvancePower DB4010 een beetje verborgen bestaan leidt. Op de website van Oral-B is deze tandenborstel niet te vinden en reclame lijkt er niet voor te worden gemaakt.

Toch is de Oral-B AdvancePower DB4010 elektrische tandenborstel overal te koop en niet duur. Wij namen de proef op de som en bestelden er gewoon 2 bij Bol.com.

De Oral-B AdvancePower DB4010 wordt in het buitenland en ook bij Amazon.nl ook wel verkocht onder de naam Oral-B Pro-Expert DB4010. Dit lijkt slechts een kwestie van labeling te zijn. Verschillen hebben wij niet kunnen ontdekken.

Onze ervaringen
Wij hebben de Oral-B AdvancePower DB4010 elektrische tandenborstel 7 maanden maanden uitgeprobeerd en onze ervaringen zijn erg positief. De reviews op Bol.com zijn goed; de borstel krijgt van de klanten 4,2 sterren op een schaal van 5. De door ons gekochte borstels draaiden 6 maanden krachtig en zonder storingen op de bijgeleverde batterijen (bij een gebruik van 1x per dag). Het aantal rotaties per minuut is vergelijkbaar of zelfs beter dan die van soortgelijke borstels die wel een oplaadstation hebben.

Als de bijgeleverde AA batterijen leeg zijn, kunnen deze makkelijk vervangen worden door nieuwe of oplaadbare batterijen. Vervangende opzetborsteltjes voor de Oral-B AdvancePower zijn overal te koop, omdat de gewone Oral-B borsteltjes èn de eigen merk opzetborsteltjes van het Kruidvat er op passen. De tandenborstel is compact en omdat er geen klassiek oplaadstation bij hoort, neemt deze borstel weinig ruimte in. Wij hebben er 2 geplaatst in een grote mok, maar er passen er nog meer bij.

Omdat er geen lader nodig is, zijn er voor deze elektrische tandenborstels ook geen stopcontacten in de badkamer nodig. De Oral-B AdvancePower DB4010 elektrische tandenborstel is ook erg praktisch op vakantie, omdat hij makkelijk mee te nemen is. De batterijen verwisselen tijdens je vakantie zal vaak niet nodig zijn. Eventueel kun je een kleine oplader voor AA en AAA batterijen meenemen, die je op een standaard USB-lader voor telefoons kunt aansluiten.
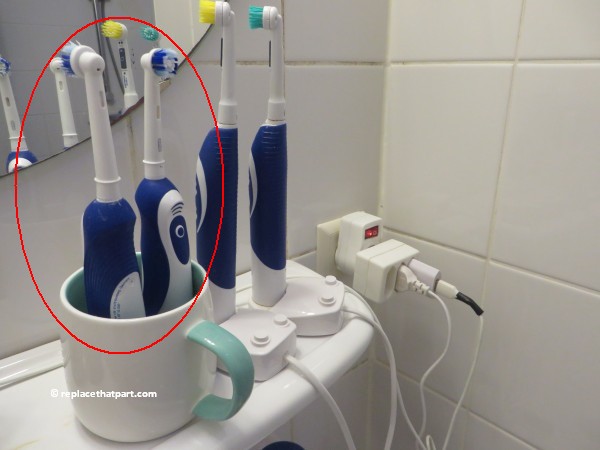
hoe vervang ik de batterijen van een oral b advancepower db4010 elektrische tandenborstel 01

Nadelen
Wij zijn maar weinig nadelen tegengekomen. Uiteraard moeten de batterijen zo nu en dan vervangen worden, maar dit gaat makkelijk; er is alleen wat kracht voor nodig. De batterijendop zit stevig aan de onderzijde van het apparaat en er is een zwarte O-ring geplaatst. Dit is noodzakelijk om binnendringen van water en kalk te voorkomen en om te voorkomen dat er door trillingen storing ontstaat.

Daarnaast heeft deze elektrische tandenborstel geen timer. Er zijn verder geen geavanceerde (overbodige) technische snufjes, die je bij dure elektrische tandenborstel soms wel ziet. De de Oral-B AdvancePower is een goed werkende standaard basis-tandenborstel.

Hoe vervang je de batterijen?

Benodigdheden
Het verwisselen van de batterijen van de Oral-B AdvancePower DB4010 elektrische tandenborstel is eenvoudig en er is geen gereedschap voor nodig. Het enige dat nodig is zijn 2 nieuwe AA (Penlite) batterijen of 2 opgeladen oplaadbare (Ni-MH) batterijen en wat kracht in handen en vingers.
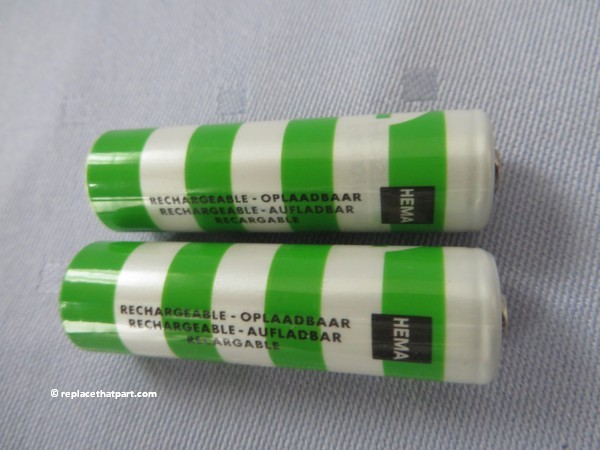
hoe vervang ik de batterijen van een oral b advancepower db4010 elektrische tandenborstel 02

1. Neem de behuizing van de elektrische tandenborstel in één hand. Omdat er wat kracht nodig is, zal het vermoedelijk het beste zijn de borstel in de rechterhand te houden als je rechtshandig bent en in de linkerhand als je linkshandig bent.
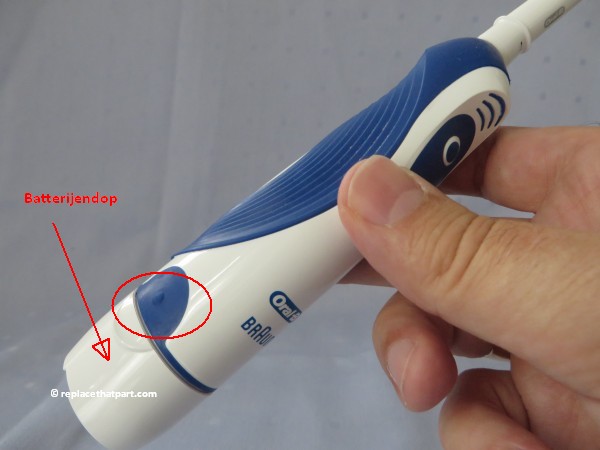
hoe vervang ik de batterijen van een oral b advancepower db4010 elektrische tandenborstel 03

2. Druk de 2 halfronde blauwe rubber vlakken, aan de onderzijde (in het midden van de vlakken zit een puntje) krachtig en tegelijkertijd in. Hierdoor wordt de onderzijde van de plastic behuizing unlocked en kan de batterijendop van de onderzijde van de behuizing getrokken worden.
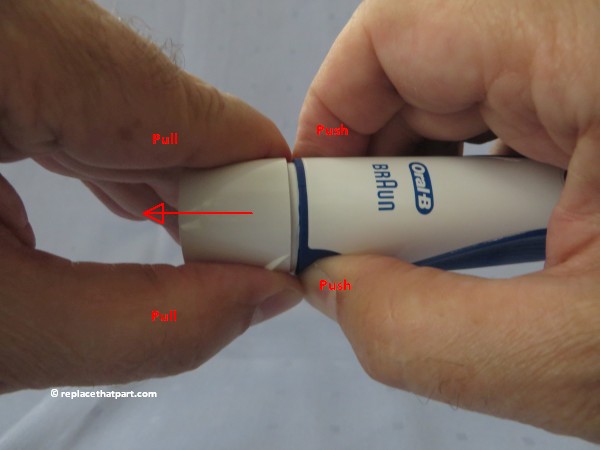
hoe vervang ik de batterijen van een oral b advancepower db4010 elektrische tandenborstel 04

3. Trek nu, terwijl je de blauwe rubber vlakken stevig ingedrukt houdt, de plastic batterijendop los van de behuizing. Op de batterijendop bevinden zich 2 randjes waarachter je je vingers kunt plaatsen. Soms moet je een beetje wrikken.
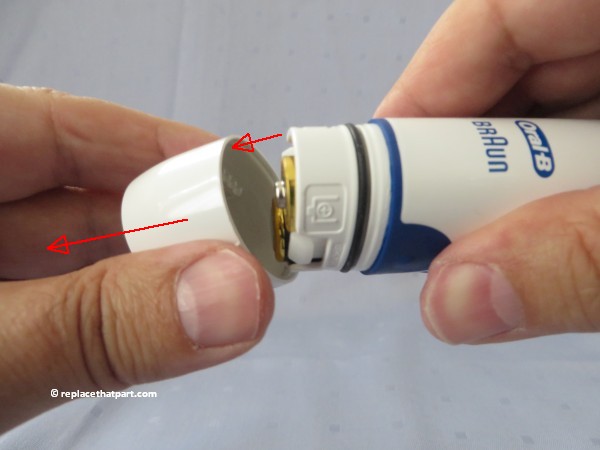
hoe vervang ik de batterijen van een oral b advancepower db4010 elektrische tandenborstel 05

4. Je ziet nu hoe de standaard AA (Penlite) batterijen in het apparaat geplaatst zijn. Let op de plus- en de min. De vlakke zijde van de batterij is de (-) minzijde, de kant met het ronde metalen puntje, de (+) pluszijde. Zoals bij de meeste apparaten moeten de batterijen tegengesteld aan elkaar in de batterijhouder geplaatst worden. Op de witte onderzijde van de behuizing staat dit door middel van een tekeningetje aangegeven.
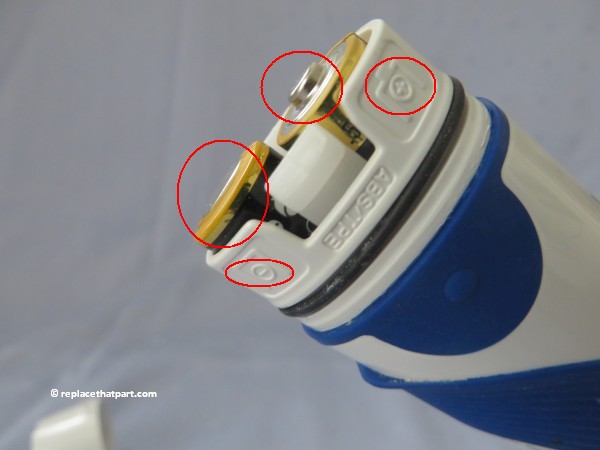
hoe vervang ik de batterijen van een oral b advancepower db4010 elektrische tandenborstel 06

Haal nu de batterijen uit de behuizing. Dit gaat heel makkelijk. Ze glijden als het ware vanzelf uit het apparaat. vervang altijd beide batterijen tegelijkertijd, ook al lijkt het er op dat er één nog niet volledig leeg is. Hiermee voorkom je een verminderde werking van het apparaat of storing op korte termijn.
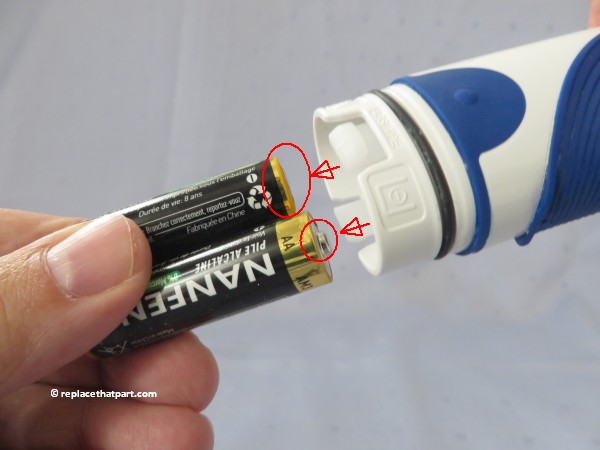
hoe vervang ik de batterijen van een oral b advancepower db4010 elektrische tandenborstel 07

5. Plaats nu de nieuwe of opgeladen oplaadbare batterijen in het apparaat, conform het tekeningetje en op dezelfde manier als de oude batterijen in het apparaat geplaatst waren.
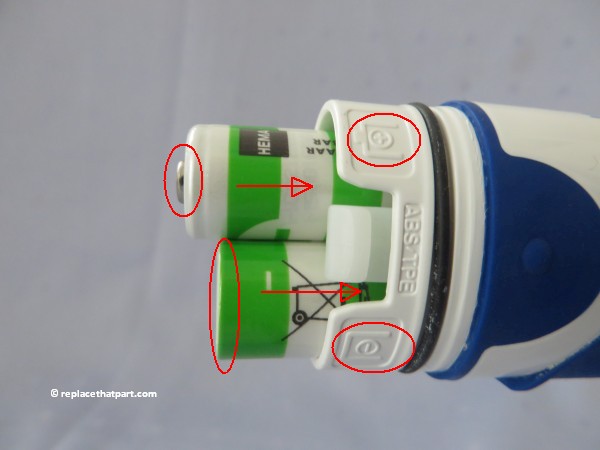
hoe vervang ik de batterijen van een oral b advancepower db4010 elektrische tandenborstel 08

6. Plaats als laatste de batterijendop weer terug op de onderzijde van het apparaat. Dit zou vrij makkelijk moeten gaan en de dop hoort met een klik vast te klikken.

Mocht dit moeizaam gaan, probeer dan kalkresten te verwijderen die zich op en bij de zwarte O-ring kunnen bevinden. Dit kun je bijvoorbeeld doen met behulp van een oude gewone tandenborstel en wat afwasmiddel. Zorg er wel voor dat je de Oral-B AdvancePower DB4010 rechtop houdt, met de onderzijde naar beneden en dat er geen water in het apparaat komt. Maak de nog geopende onderzijde na het schoonmaken goed droog met keukenpapier.

Probeer eventueel ook eens de blauwe vlakken in te drukken, in principe zou dit niet nodig moeten zijn, maar misschien helpt het.
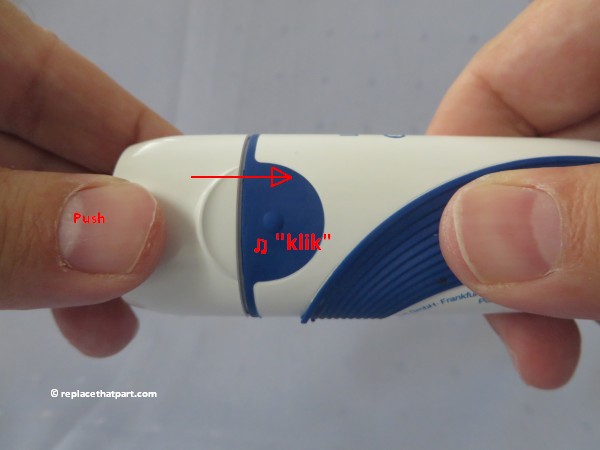
hoe vervang ik de batterijen van een oral b advancepower db4010 elektrische tandenborstel 10

7. Test of de elektrische tandenborstel met de nieuwe batterijen correct werkt door de power-knop in te drukken.
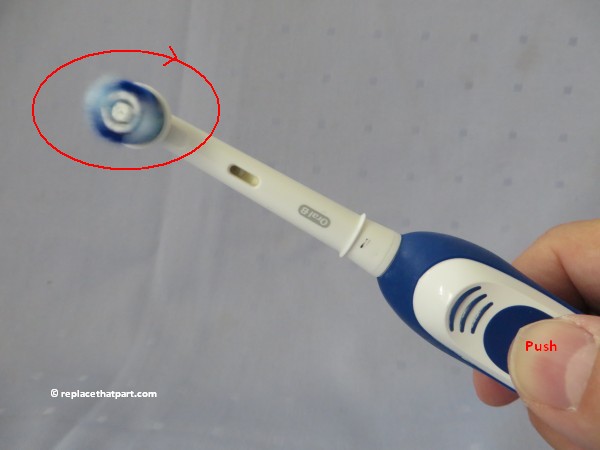
hoe vervang ik de batterijen van een oral b advancepower db4010 elektrische tandenborstel 11

Dat is alles. Je vertrouwde Oral-B AdvancePower DB4010 elektrische tandenborstel kan nu weer maanden mee en je hoeft hem niet weg te gooien. Veel plezier ermee!

How to Replace an Empty Ink Cartridge in the HP Deskjet 2751 All-in-One Printer – an Illustrated Tutorial in 11 Steps

Make sure you purchase the right ink cartridges for your specific printer and printer region or have your old ones refilled. Cartridges are not compatible between different brands, and often not within the same brand. HP often designs its inkjet hardware to use country-specific consumables. When you unbox a new HP inkjet printer and set it up, you install a set of ink tanks that ship with the printer. As you turn on the device and get ready to use it, an initialization sequence localizes it to the country associated with the ink cartridges you installed. HP recommends that you use original HP ink cartridges.

You can check the estimated ink levels from the printer control panel, from the HP printer software, and from the HP Smart App.

To check the ink levels from the printer software (Windows):
– Open the HP printer software.
– In the printer software, click Estimated Levels.

To check the ink levels from the printer control panel:
ink level icons on the printer display show an estimate of ink remaining in the cartridges.

To check the ink levels from the HP Smart App:
Open the HP Smart App on your mobile device. The estimated ink levels for your printer appear at the top of the screen, beside the picture of the printer.

XL (Extra Large) cartridges cost more but do provide better value in the long run. They will be able to print almost 2 times as many pages as a regular cartridge. Our advice is that if you print often, go with XL. However, ink can dry up. So if you are not a frequent printer, go with the regular cartridges.

Ink level warnings and indicators provide estimates for planning purposes only. When you receive a low-ink warning message, consider having a replacement cartridge available to avoid possible printing delays. You do not have to replace the cartridges until the print quality is unacceptable.

Use the single-cartridge mode to operate the HP All-in-One with only one print cartridge. The single-cartridge mode is initiated when a print cartridge is removed from the print cartridge carriage.

Which ink cartridges do I need for my HP Deskjet 2751 All-in-One series Printer?

For your US HP DeskJet 2751 All-in-One Printer you need HP 67 Black AND HP 67 Tri-color cartridges OR the XL versions: HP 67XL Black AND HP 67XL Tri-color cartridges. Check the price of HP 67 cartridges at Amazon.com .

For your European or UK HP DeskJet 2751 All-in-One Printer you need HP 305 Black AND HP 305 Tri-color cartridges OR the XL versions: HP 305XL Black AND HP 305XL Tri-color cartridges.
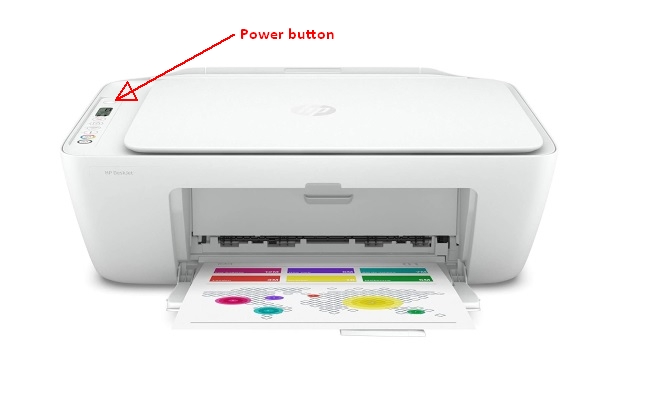
Try Amazon's ink selector tool to find compatible ink cartridges for your printer.

Replace the ink cartridges

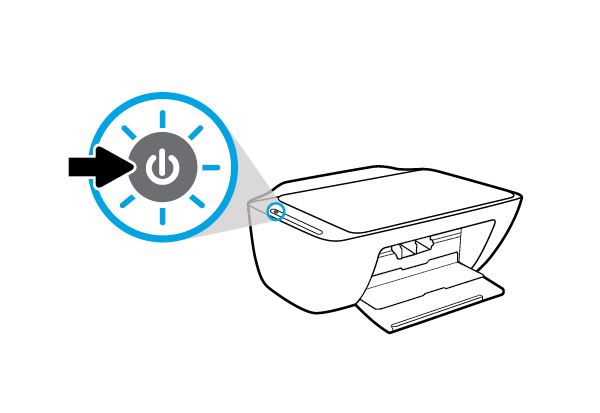
1. Press the Power button to turn on the printer, if it is not already turned on.
hp deskjet 2751 replace ink cartridges 01

hp deskjet 2751 replace ink cartridges 02

2. Load unused plain white Letter or A4-sized paper into the input tray.
hp deskjet 2751 replace ink cartridges 03

Remove cartridge
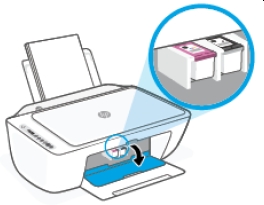
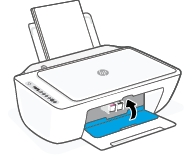
3. Lower the output tray, reach inside the printer, grasp the handle, and then lower the ink cartridge access door. The carriage moves to the center of the printer. Wait until the printer is idle and silent before continuing.
hp deskjet 2751 replace ink cartridges 04

4. Lightly press down on the cartridge to release it, and then pull the cartridge out of its slot.
hp deskjet 2751 replace ink cartridges 05

Insert the new cartridge
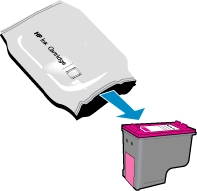
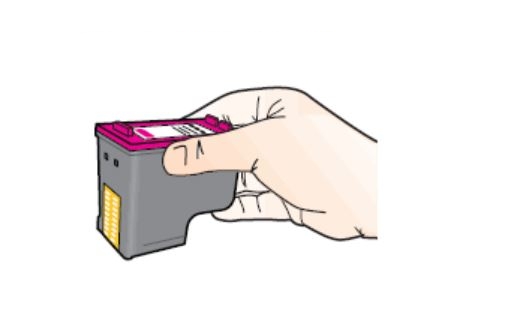
5. Remove the new cartridge from its packaging. Be careful to only touch the black plastic on the ink cartridge by holding the ink cartridge by its sides.
hp deskjet 2751 replace ink cartridges 06

hp deskjet 2751 replace ink cartridges 07

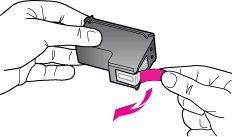
6. Pull the colored tab to remove the plastic tape.
hp deskjet 2751 replace ink cartridges 08


Do NOT:
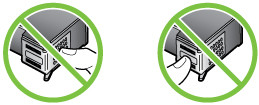
– Remove the copper electrical strip.
– Touch the copper-colored contacts or the ink nozzles.
– Replace the protective tape on the contacts.
do not touch contacts

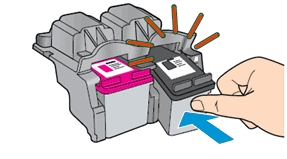
7. Hold the cartridge by its sides with the nozzles toward the printer, and then insert the cartridge into its slot at a slight upward angle. Make sure that the icon on the cartridge matches the icon on the slot. The tri-color cartridge goes in the slot on the left, and the black cartridge goes in the slot on the right.
hp deskjet 2751 replace ink cartridges 09

8. Push the cartridge forward until it snaps into place.
hp deskjet 2751 replace ink cartridges 10

9. Repeat step 4 through 8 to replace the other cartridge, if necessary.
10. Close the cartridge access door.
hp deskjet 2751 replace ink cartridges 11

Align the cartridges

11. To achieve the best print quality, it is always useful to align the ink cartridges. You can print the alignment page from the HP Smart app or from the printer software.
A. To print the alignment page from the printer software:

Open the printer software.
– In the printer software, click Print & Scan.
– Click Maintain Your Printer to access the printer toolbox.
– Click Align Cartridges on the Device Services tab.

The printer prints an alignment page.
hp deskjet 2751 replace ink cartridges 12

– Follow the onscreen instructions to align the cartridges.
– Recycle or discard the cartridge alignment sheet later.

How to Replace the battery of a Nokia 105 / TA-1037 Cell Phone – Tutorial

Make sure you purchase the right battery for your Smartphone. Batteries are not compatible between different brands, and often not among phones within the same brand. It’s recommended that you use a genuine Nokia 105 battery.

Which battery do I need for my Nokia 105 / TA-1037 Cell Phone?
For your Nokia 105 / TA-1037 Cell Phone you need a a lithium-ion rechargeable battery (sometimes called a Li-ion battery or LIB): Nokia BL-5C Battery, 3.7V 1020mAh, 3.8Wh.

(#ad or paid link)

Replace the Battery

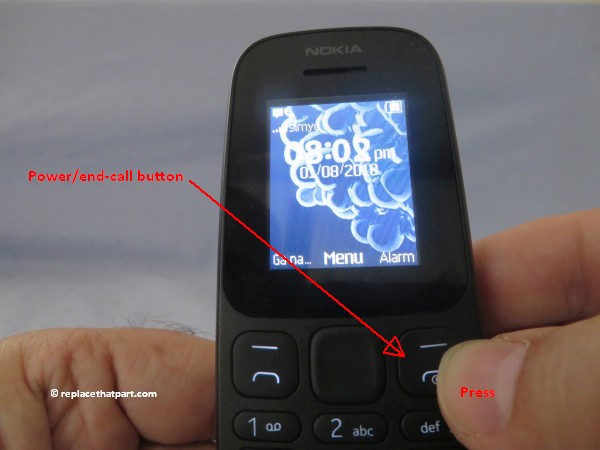
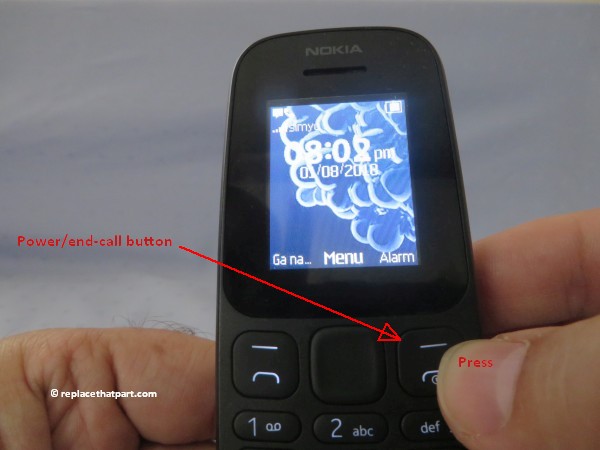
1. Turn off the power so that you won’t lose any stored information. If the device is on, press and hold the power/end-call button for a couple of seconds, until the phone shuts down.
nokia 105 ta 1037 how to replace the battery 01

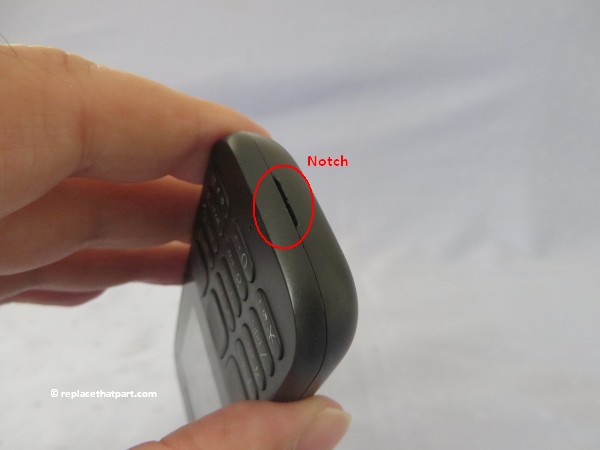
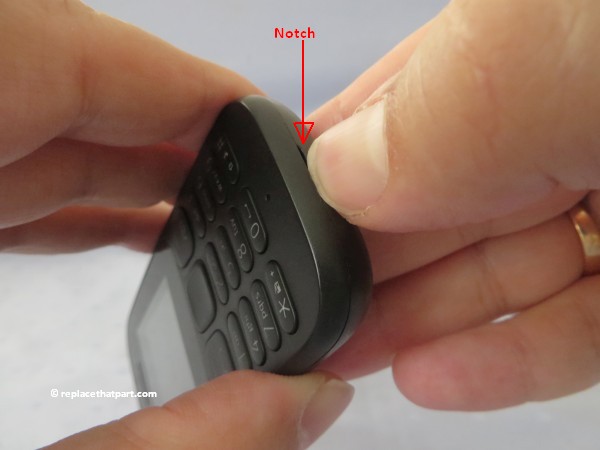
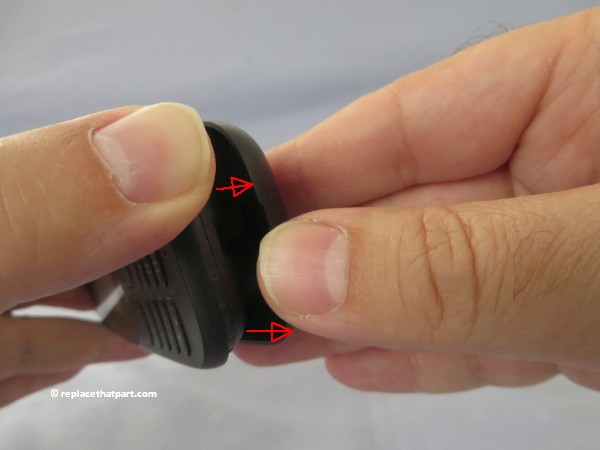
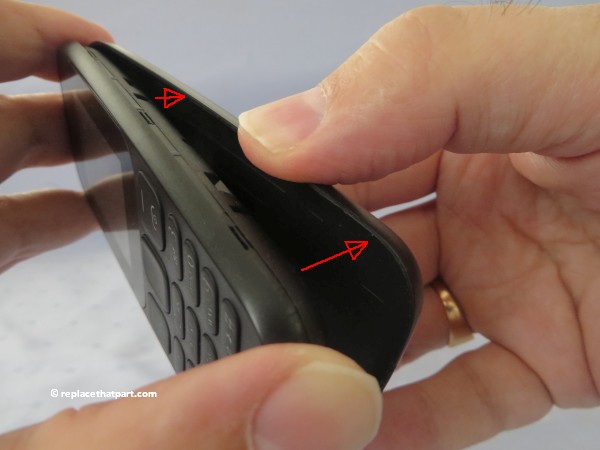
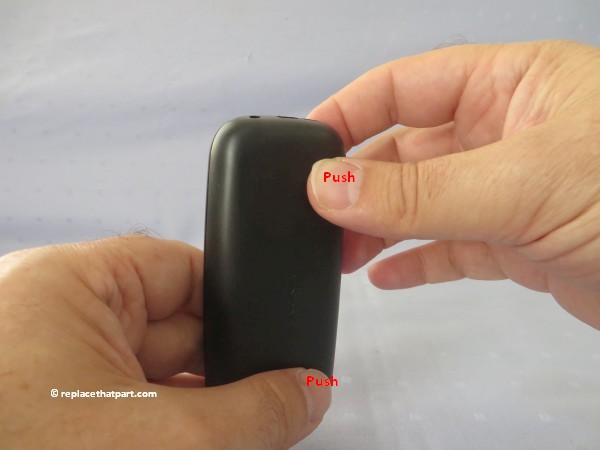
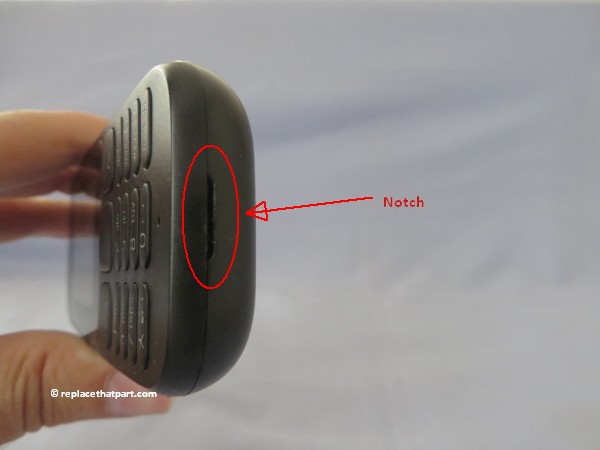
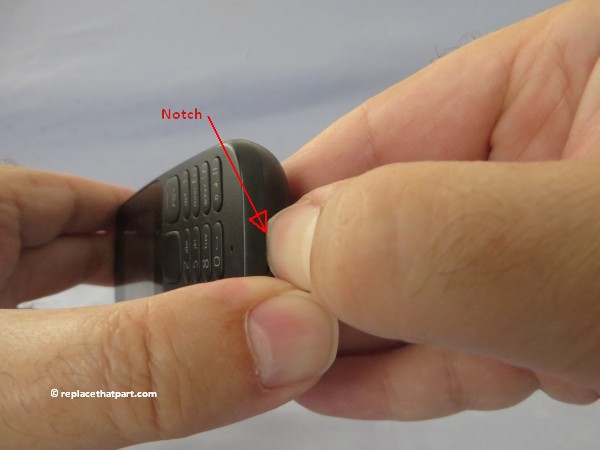
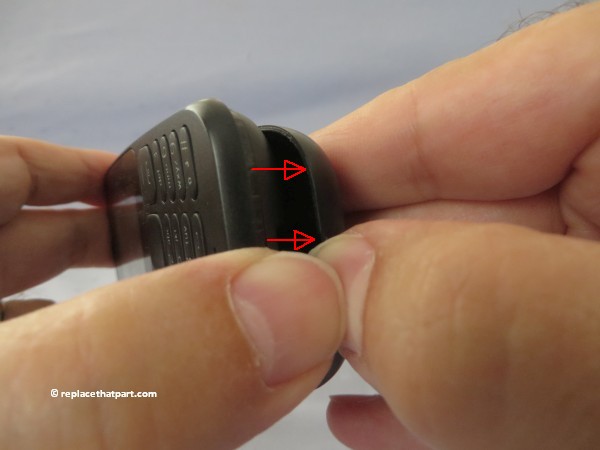
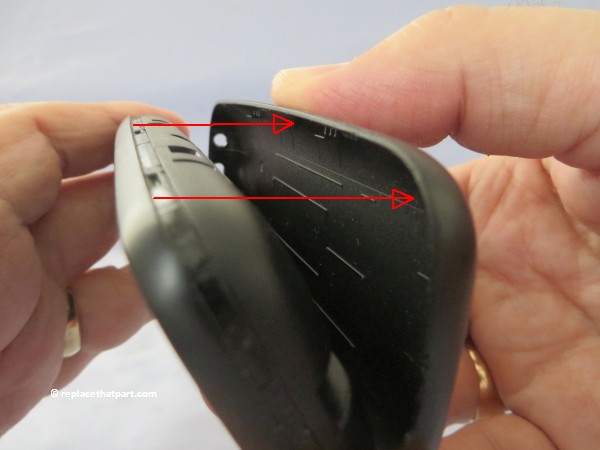
2. Remove the back cover. Hold the device in one hand and find the small notch that will help you to release the cover. It’s on the the bottom of the phone. Insert a fingernail into the notch. Lift upwards gently to pop the phone open. Some force is probably needed. Be careful not to damage your fingernails when you remove the back cover. Also, be certain not to bend or twist the back cover excessively. Doing so may damage the cover.
nokia 105 ta 1037 how to replace the battery 02

nokia 105 ta 1037 how to replace the battery 03

nokia 105 ta 1037 how to replace the battery 04

nokia 105 ta 1037 how to replace the battery 05

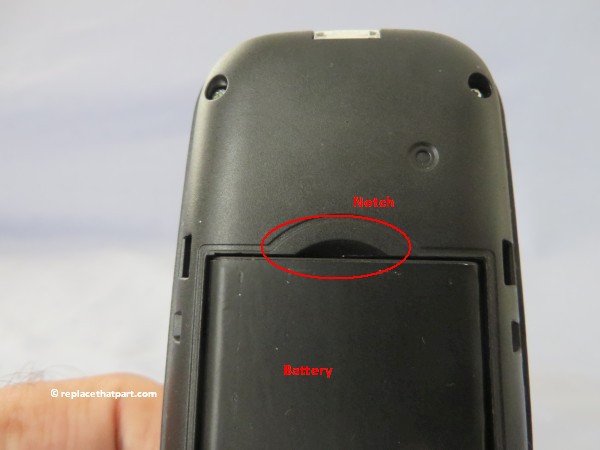
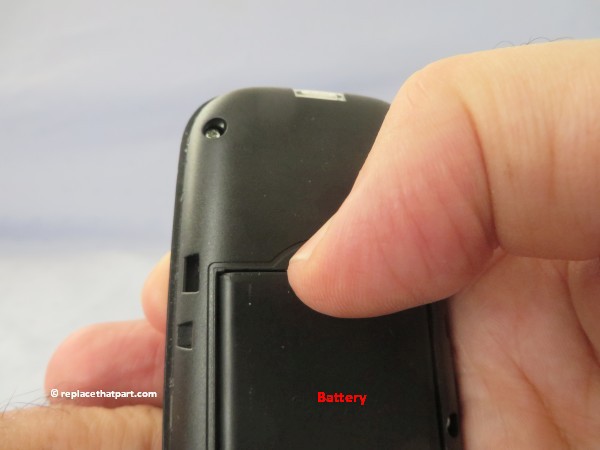
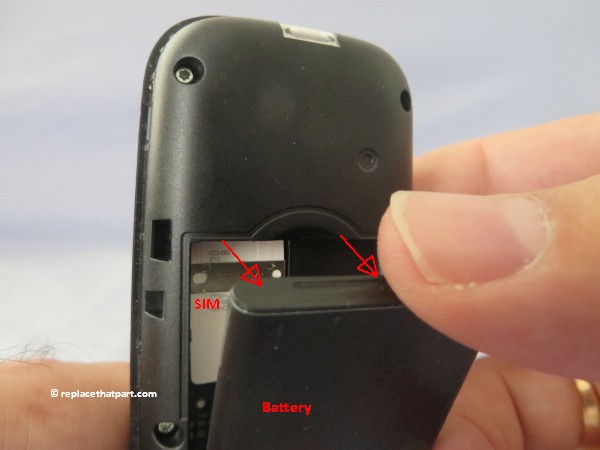
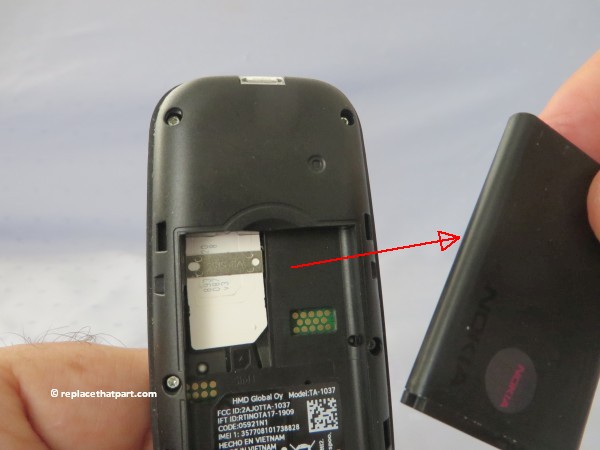
3. Remove the battery. Using your nail or finger, lift up the battery via the small notch at the top of the battery compartment and lift the battery out of the phone.
nokia 105 ta 1037 how to replace the battery 06

nokia 105 ta 1037 how to replace the battery 07

nokia 105 ta 1037 how to replace the battery 08

nokia 105 ta 1037 how to replace the battery 09

4. Install the new battery
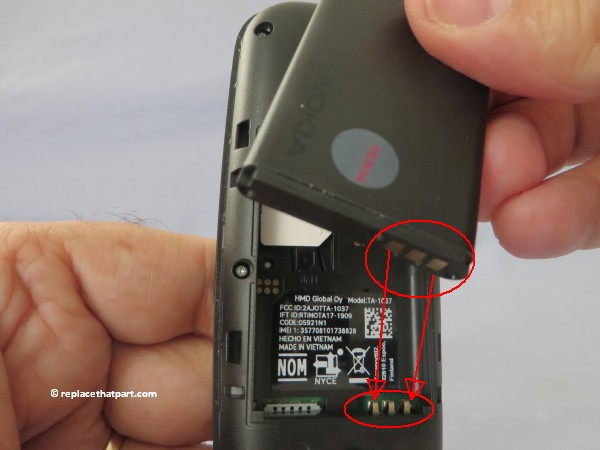
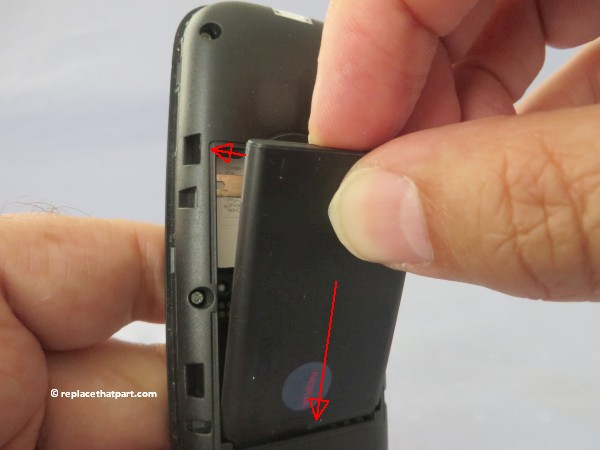
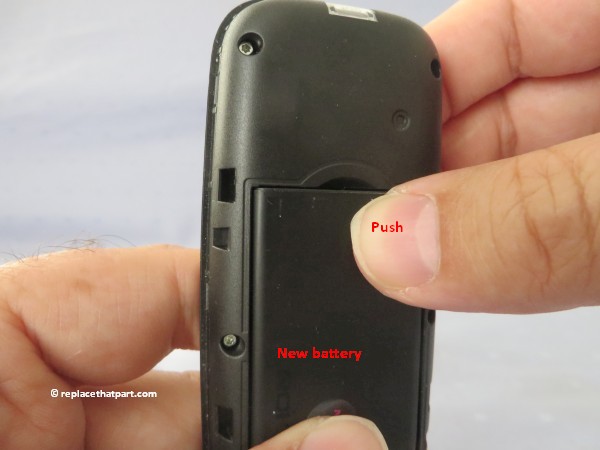
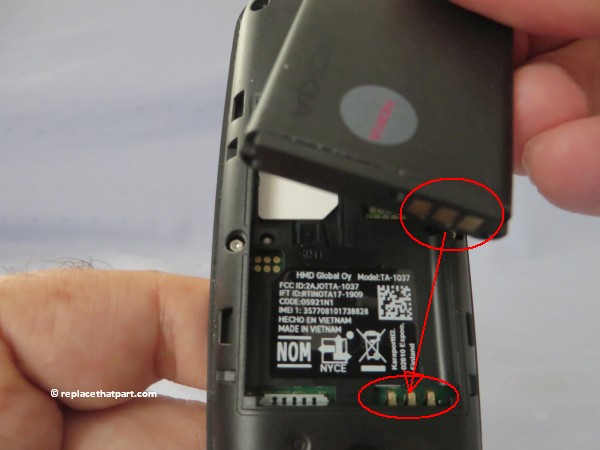
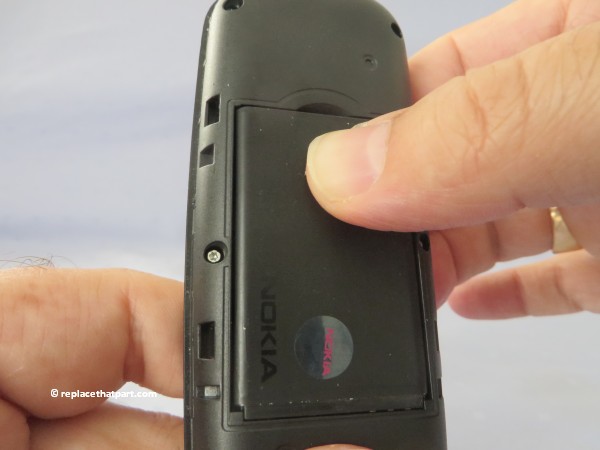
Turn the battery if necessary. The Nokia logo should be on top and in the LEFT bottom corner. Align the three gold colored contacts with the three prongs on the bottom-right side of the battery slot, as shown in the pictures below. Slide the battery into the battery housing cavity and press down gently to secure it in place. It should fit easily and exactly.
nokia 105 ta 1037 how to replace the battery 10

nokia 105 ta 1037 how to replace the battery 11

nokia 105 ta 1037 how to replace the battery 12

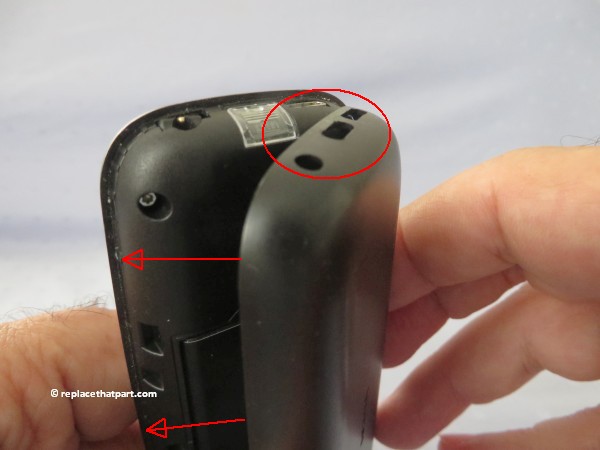
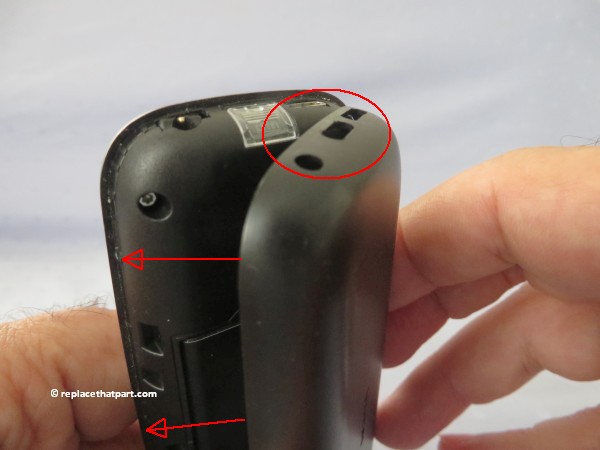
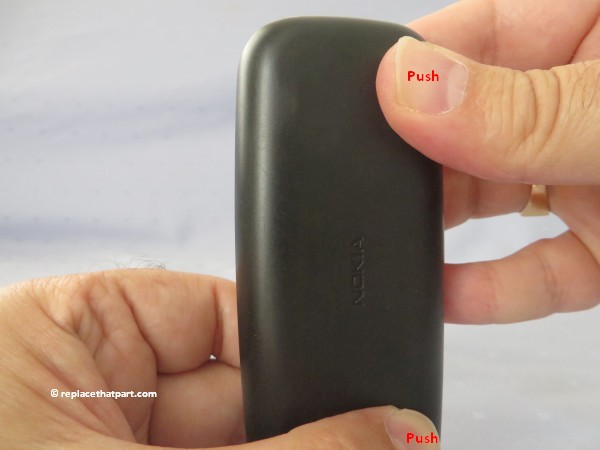
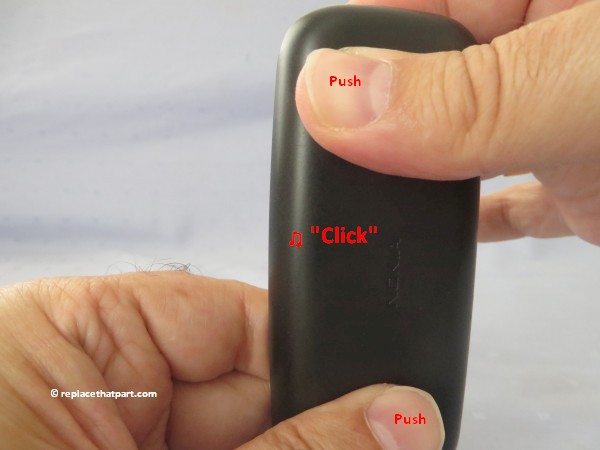
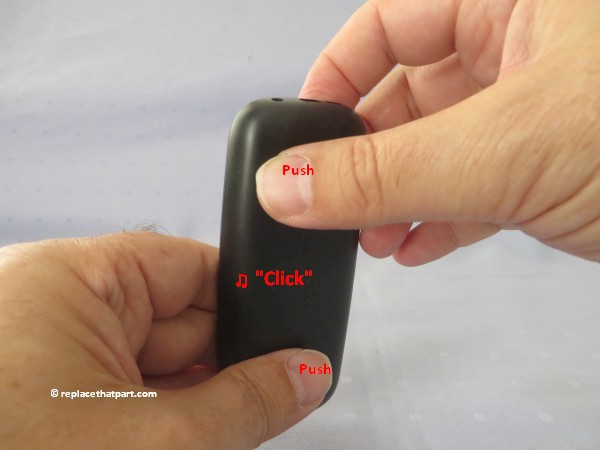
5.Replace the back cover. The 3 holes should be on top. Gently press the cover down and around the sides of the phone until it clicks into place.
nokia 105 ta 1037 how to replace the battery 13

nokia 105 ta 1037 how to replace the battery 14

nokia 105 ta 1037 how to replace the battery 15

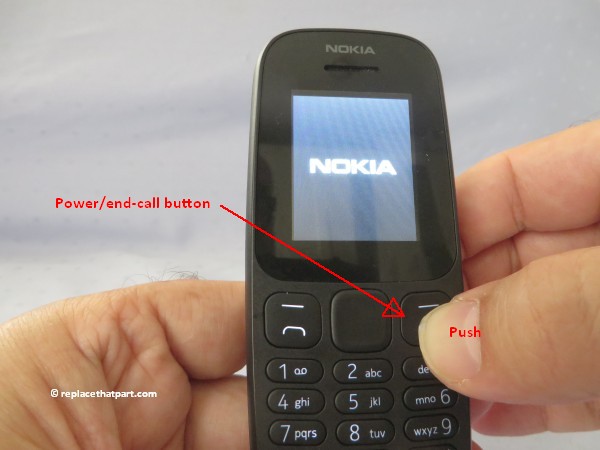
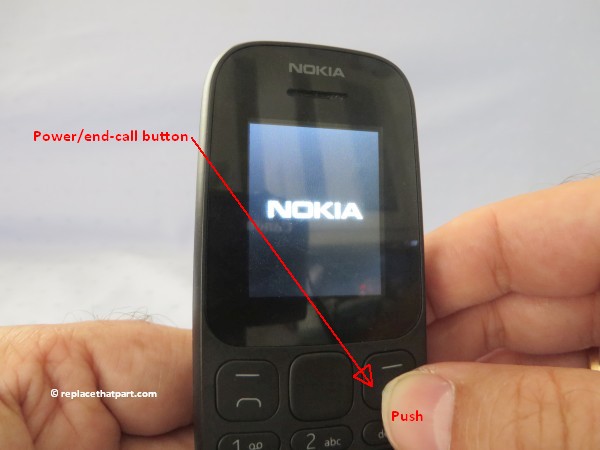
8. Press and hold the power/end-call button for 1 or 2 second. Doing so will turn your phone back on and the device will automatically search for a network.
nokia 105 ta 1037 how to replace the battery 16

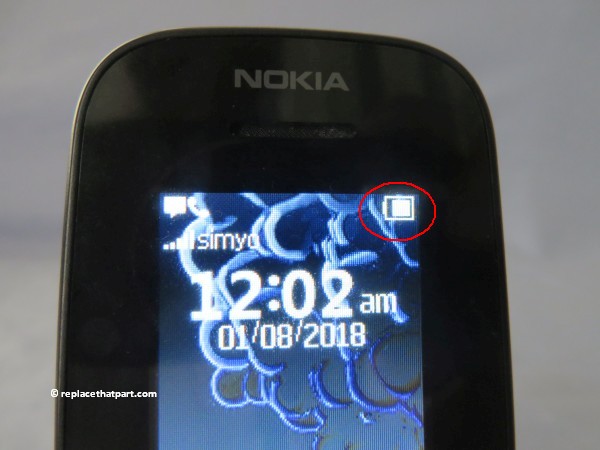
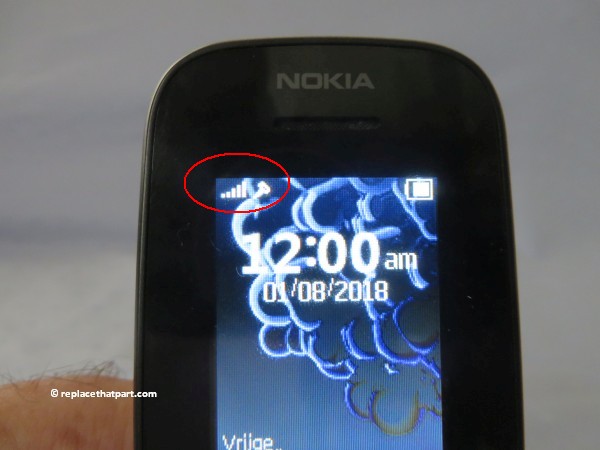
9. Check if your new battery is recognized by the device and if it’s already charged to some extent. Many battery manufacturers ship new batteries with their batteries charged around 60%. In this case, there is no real need to charge the battery before the first use. A good rule of thumb seems to be to never charge your phone up to more than 80 percent of capacity.
nokia 105 ta 1037 how to replace the battery 17

How to Insert a SIM Card into a Nokia 105 / TA-1037 Single-SIM Cell Phone – Tutorial

Which SIM Card do I need for my Nokia 105 / TA-1037 Single-SIM Cell Phone?

Note: it appears that there are two versions of the Nokia 105 / TA-1037 available: a single-SIM version and a dual-SIM one. This manual has especially been written for the single-SIM phone. However, the basics are the same, so you can use this tutorial for the dual-SIM version too.

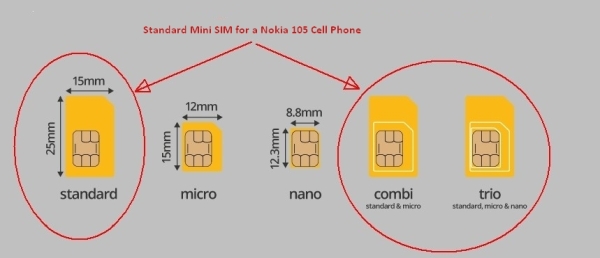
Make sure you use the correct size SIM card. Depending on the model of phone, there are three sizes of SIM card that can potentially be used in a phone: Standard Mini SIM, Micro SIM and Nano SIM. The three SIM card types work in exactly the same way from a technical perspective. They just differ in the amount of plastic housing that surrounds the metallic chip. The Combi SIM is a Micro SIM card within a Standard Mini SIM-sized unit, so if you need the smaller size of card you simply break the additional plastic away from around the Micro SIM card. This type of card allows networks to cater for more phone users with a single card. A Trio SIM is a Standard Mini SIM, a Micro and a Nano in one. Most of the pay-as-you-go SIM cards you buy from convenience stores operate under this format as they’re more useful to more users.

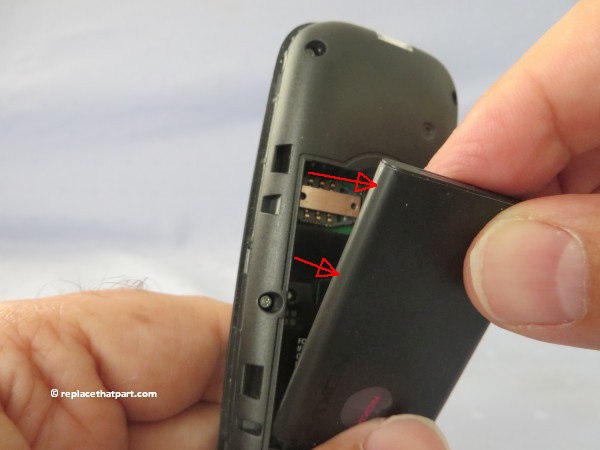
The Nokia 105 – TA-1037 only accepts 1 (sometimes 2) big standard Mini SIM size card. You can also use a Combi SIM or Trio SIM and NOT break away the plastic from around the SIM card. Only remove the Standard SIM from the plastic card.
nokia 105 ta 1037 single sim how to insert sim card 01

Sometimes getting a replacement SIM from your mobile network provider could be a hassle. If you already have a smaller SIM or if you find yourself switching phones around a lot, you may need to adapt — with a SIM adapter — any time you need to go bigger. They are used to transform your sim card into a bigger size which is compatible with your phone. These adapters are quite cheap to purchase, however, getting a good quality adapter would mean that it would be able to let you fit your sim tightly. Using one of those thin flimsy plastic SIM adapters (they usually have a hole in the back) or use one that uses tape to hold the SIM in is NOT recommended. Don’t place an empty SIM adapter in your phone, you must use it with the SIM card already inserted. An empty adapter might damage your phone.

Popular SIM card adapters cards include, but are not limited to:

  • Gold Samdi Brand Nano Sim Adapter and Micro Sim Adapter and Nano to Micro Adapter with a Sim Card Folder and a Needle
  • Sadapter Three Adapter Pack – Retail Packaging – Black
  • Noosy Sim Card Adapter Kits with Nano Sim Adapter and Micro Sim Adapter

Insert a SIM Card

1. Turn off the power so that you won’t lose any stored information. If the device is on, press and hold the power/end-call button for a couple of seconds, until the phone shuts down.
nokia 105 ta 1037 single sim how to insert sim card 02

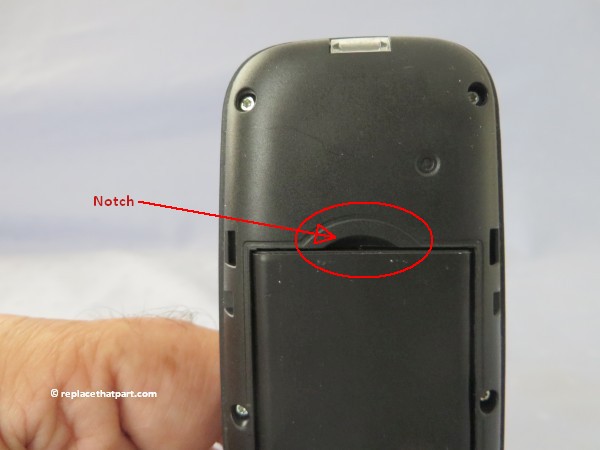
2. Remove the back cover. Hold the device in one hand and find the small notch that will help you to release the cover. It’s on the the bottom of the phone. Insert a fingernail into the notch. Lift upwards gently to pop the phone open. Some force is probably needed. Be careful not to damage your fingernails when you remove the back cover. Also, be certain not to bend or twist the back cover excessively. Doing so may damage the cover.
nokia 105 ta 1037 single sim how to insert sim card 03

nokia 105 ta 1037 single sim how to insert sim card 04

nokia 105 ta 1037 single sim how to insert sim card 05

nokia 105 ta 1037 single sim how to insert sim card 06

3. Remove the battery. Using your nail or finger, lift up the battery via the small notch at the top of the battery compartment and lift the battery out of the phone.
nokia 105 ta 1037 single sim how to insert sim card 07

nokia 105 ta 1037 single sim how to insert sim card 08

nokia 105 ta 1037 single sim how to insert sim card 09

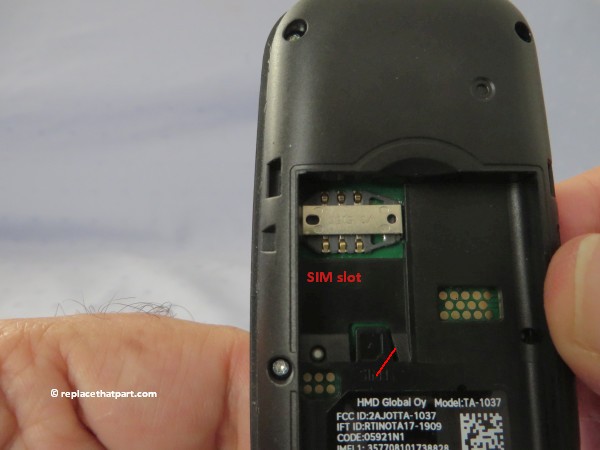
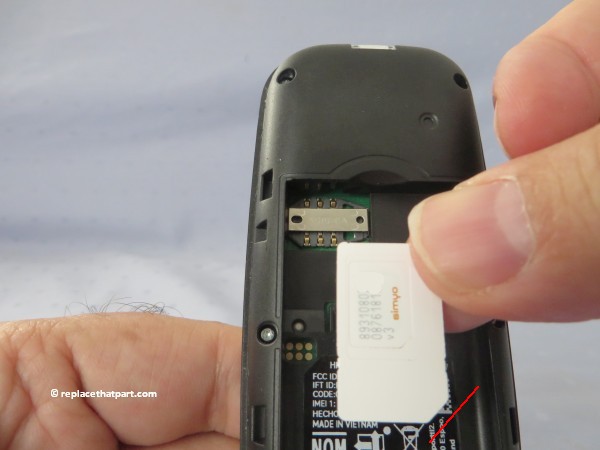
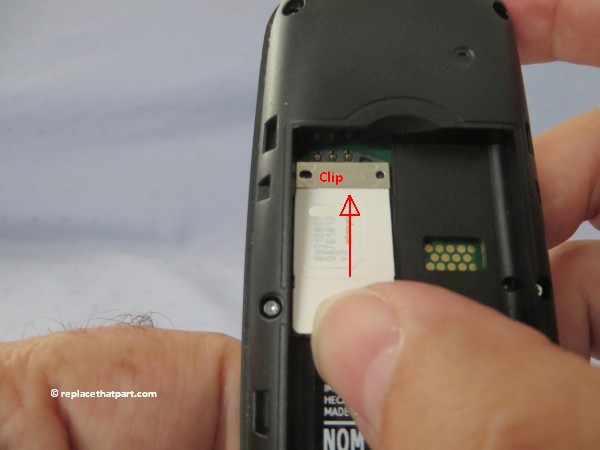
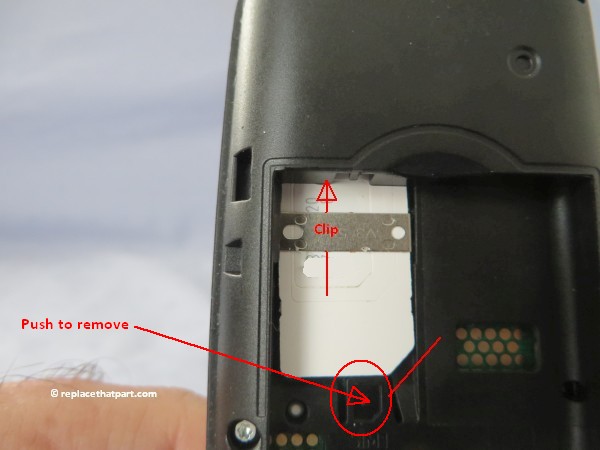
4. Place the SIM card with the gold contacts facing downwards and slide it under the metal clip and into the housing, marked with SIM 1. The SIM card’s missing corner must be on the BOTTOM RIGHT side.
nokia 105 ta 1037 single sim how to insert sim card 10

nokia 105 ta 1037 single sim how to insert sim card 11

nokia 105 ta 1037 single sim how to insert sim card 12

Remove the SIM
Removing the SIM is a little harder. First, you have to push in the small plastic button with the SIM drawing on it (above SIM 1). Then you can slide it out backwards.
nokia 105 ta 1037 single sim how to insert sim card 13

6. Reinstall the battery. Turn the battery if necessary. The Nokia logo should be on top and in the LEFT bottom corner. Align the three gold colored contacts with the three prongs on the bottom-right side of the battery slot, as shown in the pictures below. Slide the battery into the battery housing cavity and press down gently to secure it in place. It should fit easily and exactly.
nokia 105 ta 1037 single sim how to insert sim card 14

nokia 105 ta 1037 single sim how to insert sim card 15

nokia 105 ta 1037 single sim how to insert sim card 16

7. Replace the back cover. The 3 holes should be on top. Gently press the cover down and around the sides of the phone until it clicks into place.
nokia 105 ta 1037 single sim how to insert sim card 17

nokia 105 ta 1037 single sim how to insert sim card 18

nokia 105 ta 1037 single sim how to insert sim card 19

8. Press and hold the power/end-call button for 1 or 2 second. Doing so will turn your phone back on and the device will automatically search for a network.
nokia 105 ta 1037 single sim how to insert sim card 20

9. Check if your SIM card is recognized by the device. After ‘Searching’, the name of your network provider should be visible at the top of the display. This takes about 5 seconds.
nokia 105 ta 1037 single sim how to insert sim card 21