One of the frustrating things about owning a laptop is that, sooner or later, it can’t keep up with the demands of your software. But there’s some good news: you can help your laptop keep up with the times by upgrading its Random Access Memory (RAM). RAM helps your computer run applications. Your computer stores temporary information within the memory cells and refers to the data as it runs applications. When a computer runs short of RAM, it’s forced to swap the overflow data on and off of the hard drive, which can significantly slow performance. Chances are your laptop has plenty of capacity for more RAM. It will likely speed things up, and it’s easier to install than an SSD, which requires you to move your operating system and other files. While installing additional or all-new memory is not terribly complicated, even for a beginner geek, buying the proper memory can be a frustrating challenge.
Will extra RAM make my laptop faster?
Additional memory will not necessarily increase the performance of your computer. It will allow you to run more programs or processes at once or more memory intensive programs. There may be a performance increase if the original amount of memory installed was close to insufficient for the programs and processes you use the computer for. If you use Google Chrome for example, you might have noticed just how much RAM the browser tends to eat up. Currently Chrome creates a new process for each tab and instance of the browser opened. This can make the browser sluggish on some machines and a battery life nightmare for mobile users. Extra RAM might help here.
Does RAM affect how fast the laptop starts up?
The capacity and speed of your computer’s system memory, or RAM, can have a noticeable effect on your laptop start-up speed. Faster RAM can improve communication speed with the processor and decrease load times. Also, having enough RAM capacity to load the entire operating system and all start-up programs will improve load times. However, as long as you have enough RAM, it is not what’s going to have the biggest impact in laptop start-up time. The processor and motherboard can handle the data load without a problem, but the hard drive slows down the show. The hard drive is not as fast as the RAM or the CPU.
1. Alternative ways to make your laptop run faster
Make sure that increasing your laptop’s RAM is what you need. Before you spend money on extra RAM, you may find it only takes a few simple tweaks to make your computer run faster:
First, your software should be perfect:
Remove all viruses
Remove all spyware
Remove all unnecessary software and files
Clean your PC (use CCleaner for example)
Update Windows
Update Software
Update drivers
Clean your register
Defrag your register
Now restart your laptop and check your hardware:
Defrag your harddrive
Check if you have sufficient disk space left
Check if you have sufficient memory (RAM). Go to step 2.
Making your laptop faster without buying new RAM is outside the scope of this tutorial, but here are some resources:
2. Do I need more RAM?
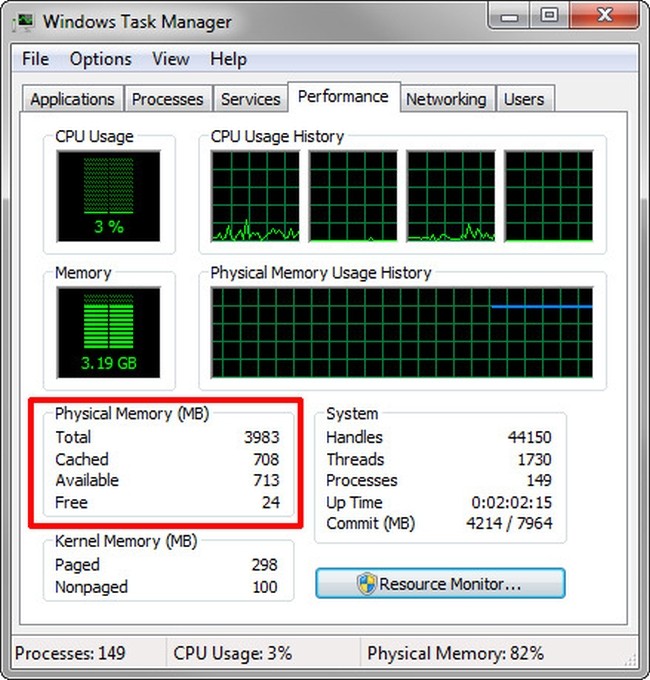
To find out if your laptop pc might need more RAM, right-click the Task Bar and select Task Manager. Click the Performance Tab: In the lower-left corner, you’ll see how much RAM is in use. If, under normal use, the Available option is less than 25 percent of the total, an upgrade may do you some good.
Upgrading RAM
So, after performing step 1 and 2, you’re now convinced you need some more horsepower. The first step to upgrading your RAM involves gathering a little information. You are probably wondering what type of memory is already installed, how many open slots you have, and what you need to buy for an upgrade.
3. Find out how much RAM your laptop computer has
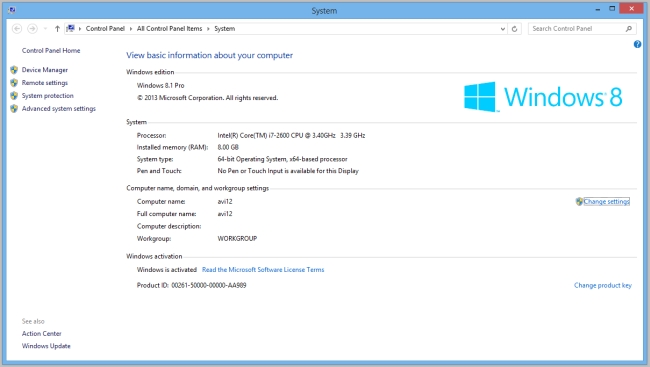
First, you need to know how much RAM your computer has already. To do that, you point your cursor to the My Computer icon on your desktop, right-click, and choose Properties. In the System Properties window, the system will list Installed memory (RAM) with the total amount detected. For example, in the picture below there is 8 GB of memory installed in the computer.
Let Crucial decide
Memory manufacturer Crucial has put together an amazing website, combined with an optional system scanner tool that will detect the memory already installed in your laptop. Crucial is a retailer. They’ll give you various upgrade options. You have the choice of buying from them, or using that information to shop elsewhere. On Crucial’s homepage, there’s two options:
4. Using Crucial’s website
If you’ve already figured out the memory you have installed, you can use the drop-down menus on the left to select your system. They will give you some great information about what your laptop can support, along with a list of questions and answers.
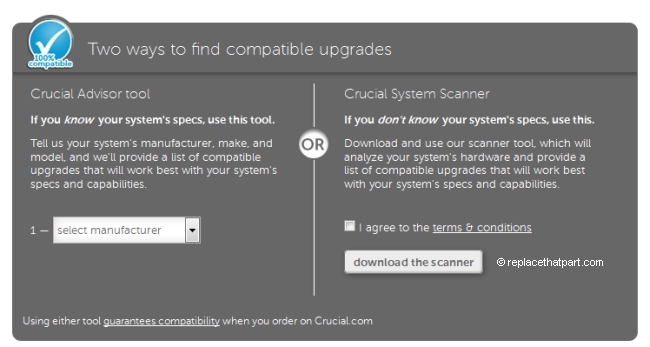
5. Using the Crucial System Scanner
When you download and run the scanner program, it will display its results in your browser. Those results will tell you how many slots you have, how many are empty, and what’s in the ones that aren’t. The results will also tell you what type you need to buy.

That’s all! > Now go to step 11.
DIY; make your own decisions.
Crucial’s Memory Advisor is extremely useful to figure out what you need. However, there are many ways to skin a cat. You can also follow these more advanced steps to figure out what you need for your system:
6. Inspect your hardware
The first option is to open your laptop’s RAM access door and remove the existing RAM so that you can inspect it and see how many empty memory slots you have in your system. While this sounds like the harder option, it’s a good way to learn about the SODIMMs and slots in your computer.
IMPORTANT
- Before you take things apart, make sure to shut down and turn off the computer AND remove the power cable!
- Disconnect all external devices attached to the laptop (like printers, flash drives, and headsets).
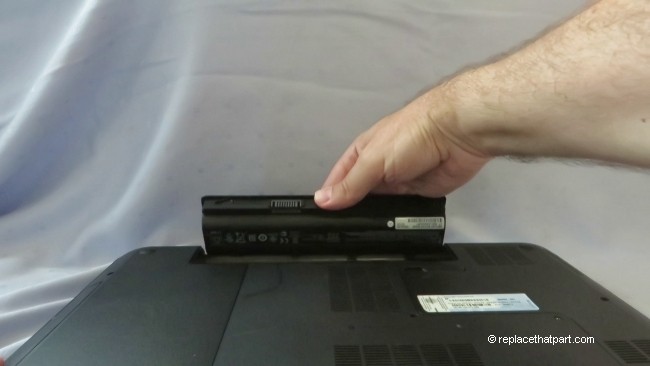
- Remove the battery. This will prevent you from accidentally shorting anything on the system board during this process. Pull the two battery latches outwards, then remove the battery.
- Discharge residual power by pressing the power button.
- Ground yourself before handling the RAM to avoid electrostatic discharge. Touch some grounded metal (like a tap) first.
- Try to not touch the contacts on the RAM.
Now you’ll need to find the memory compartment door. Different manufacturers put these slots in different places, but on most laptops, you’ll find a small door on the underside of the machine. Using the appropriate screwdriver, open the door and take a look inside. You can remove a RAM module by pressing on the little ejector clips that hold the module in place. Putting the stick back is fairly straightforward — it should just slide into place and, once you give it a little push, it’ll lock down with the help of the clips. Again, your experience may be different depending on the company that made your computer, so make sure to check your owner’s manual or support Web site before you start opening your laptop’s RAM access door.
Go to step 12 for detailed and illustrated instructions.
When you do NOT want to open your laptop’s memory compartment door in this stage to inspect the slots and memory sticks, there are alternative ways to determine you memory upgrade needs:
7. Using CPU-Z
CPU-Z is a freeware system profiling and monitoring application that detects the central processing unit, RAM, motherboard chipset, and other hardware features of a modern personal computer.
a. Download and run CPU-Z
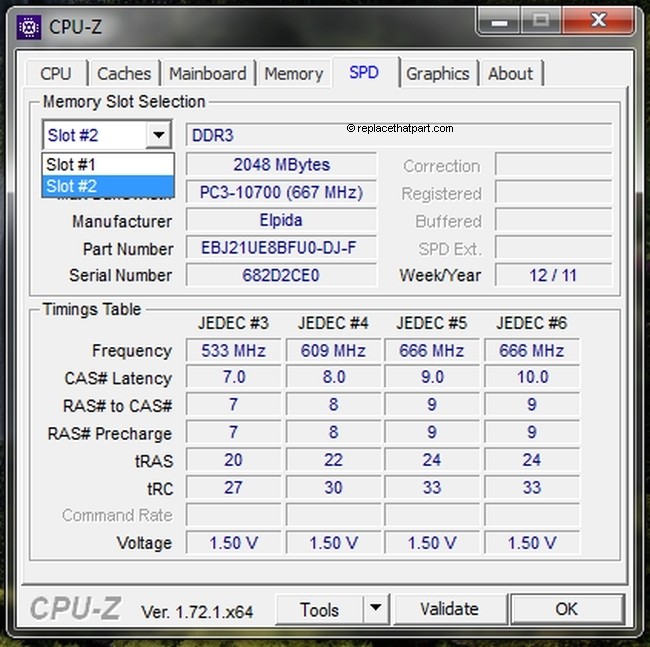
b. Click the SPD tab.
c. Click the down arrow next to Slot # to view how many memory slots are in your laptop.
d. View the information for each memory slot to see if it is occupied and by what type and amount of memory if it is. This lets you know which memory slots are in use in your computer.
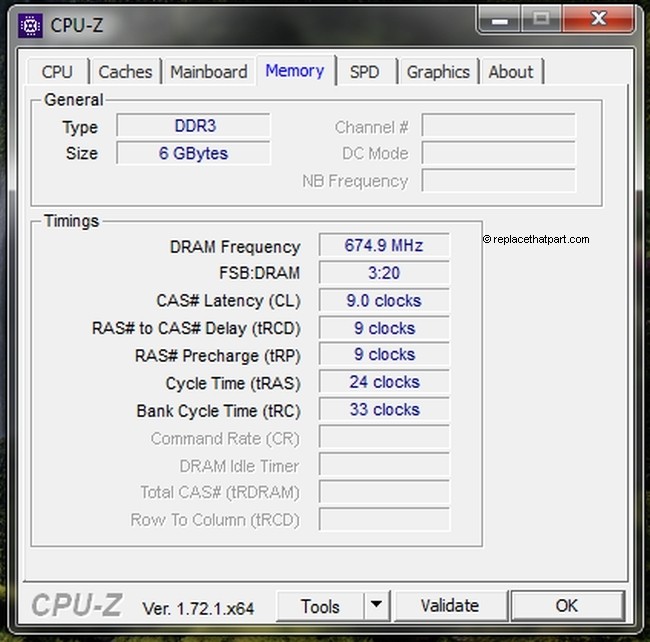
e. Click the Memory tab to see the actual speed and timings your RAM is running.
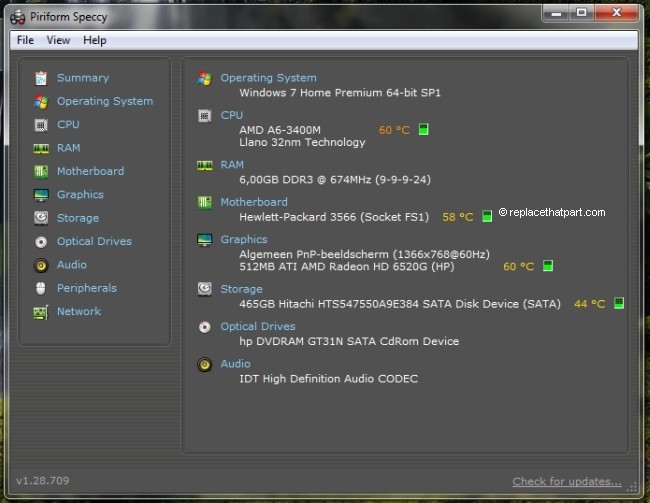
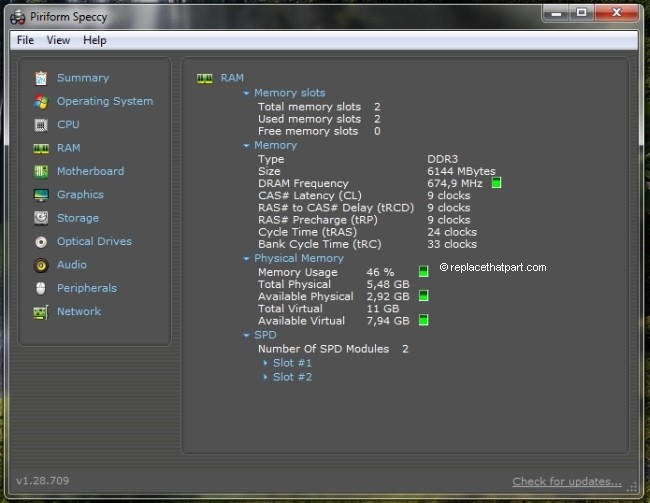
8. Using Speccy
Speccy, developed by the creators of CCleaner is avery useful free application should be a standard in any geek’s toolkit. It comes bundled as a single file, no installation required, assuming you download the portable version. They also have a paid version with more features. You can immediately see the type of RAM you have installed.
9. Other Options
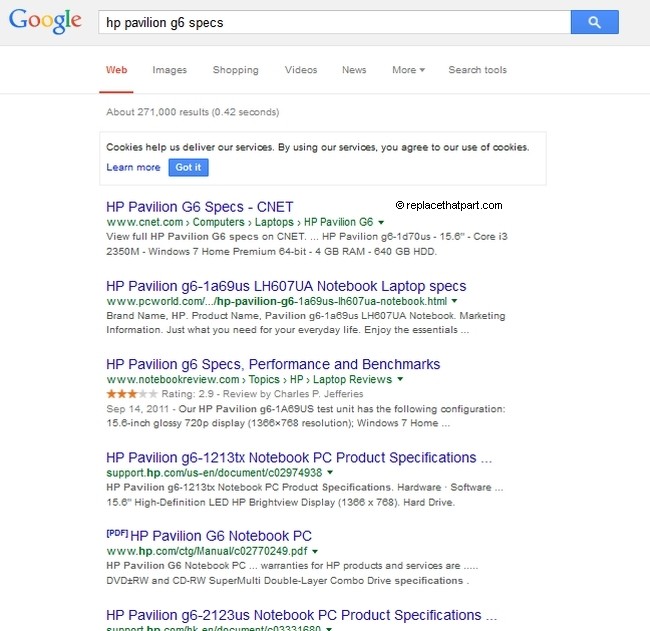
- You can usually find the specs for your laptop online and figure out what memory types your computer takes. Use Google and search for “[your modelnumber] specs”. Note that this is not the most reliable method of finding information about your laptop’s hardware. Many laptop manufacturers provide a type of model name near the laptop keyboard or screen, but this name or number might not be sufficient to obtain support for your computer. These names or numbers often represent a series of many laptop computers that look similar, but have different options, parts, or configurations.
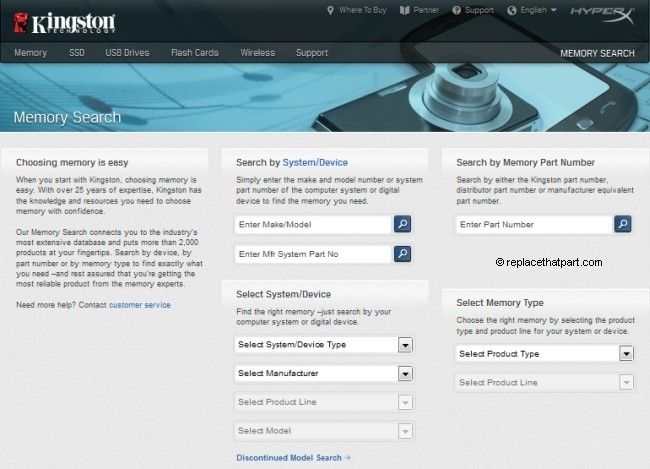
- You can use some of the other memory advisors, like Kingston Memory Search or PNY.
- Pull out the manual for your laptop computer, and take a look at your receipts to figure out what you bought last time.
10. How Much Memory Do You Need?
At this point you have a couple of decisions to make. How much more memory do you want to add? If you just want to double your memory, and you have a SODIMM slot available, then all you need to do is purchase another, identical stick (or module) of RAM. If you want to add more than that, then you have to find a memory module with a higher RAM capacity. If all of your SODIMM slots are filled, then you will have to replace the current memory modules you have with modules with a higher RAM capacity. For instance, if you have only two slots, and both are filled with two 256 MB memory modules, you will have to replace both with, say, two 1 GB modules.
OS Limitations
In the case of Microsoft Windows, the basic versions of the operating systems put software limitations on the amount of RAM that can be used by applications, but even in the ultimate and professional version of the operating system, 4 GB is the maximum usable memory the 32-bit version can handle. There’s theoretically no currently reachable upper limit on the amount of RAM addressable in PCs with 64-bit operating systems, though in practical terms 16 GB is going to be the max for most people. Chances are that most laptops manufactured today will be able to handle 8 GB, but it’s best to check to be sure.
Speeking of 2015, the baseline for RAM in a laptop is 4 GB; that’s how much you can expect from a budget model, and it’ll just about do the job — just don’t expect to be running high-intensity programs or to have several applications open at the same time without performance taking a hit. Something to keep in mind as Black Friday deals roll around. Some “doorbuster” laptops will have only 2GB of RAM, and that’s just not enough. 6 GB is closer to the current norm, and it’ll be enough to keep your computer fresh for the immediate future. For gamers wanting to keep up with new releases, or if you need access to hardware-intensive programs like video editing software, then it’s worth having 8 or even 16 GB of RAM at your disposal. If in doubt, add more RAM. If the RAM you have installed on your computer is less than what you need, don’t fret — these days, a RAM upgrade can be quite inexpensive, and the component itself is relatively easy to install.
11. What Kind of Memory Do You Need?
Laptop computers require Non-ECC Unbuffered (Non-Registered) SODIMMs. The module size is physically about half as long as desktop memory. The most common technologies are DDR2 (200 pins) and DDR3 (204 pins). Outdated models you may still come across are DDR(1) and SDRAM. Each type is physically and electrically incompatible, keyed notches prevent installing the wrong type of memory. In general, DDR2 or DDR3 isn’t going to matter in terms of capacities. DDR3 is faster and more energy efficient, but not inherently capable of greater capacities than DDR3. When installing RAM be sure you place them in pairs which allows them to run at optimal capacity. Installing in pairs means to place the pairs of RAM in slots 1 and 3 or 2 and 4.
Memory speeds and compatability
Memory is designed to be backward-compatible, so generally speaking, you can safely add faster memory to a laptop that was designed to run slower memory. However, your system will operate at the speed of the slowest memory module.
Dual Channel Mode
Modules rated at different speeds can be run in dual-channel mode, although the motherboard will then run all memory modules at the speed of the slowest module. Some motherboards, however, have compatibility issues with certain brands or models of memory when attempting to use them in dual-channel mode. For this reason, it is generally advised to use identical pairs of memory modules, which is why most memory manufacturers now sell “kits” of matched-pair DIMMs. Several motherboard manufacturers only support configurations where a “matched pair” of modules are used.
RAMs Best Practice (oldschool but still applies):
a. Least ammount of modules
b. Most matched modules
Bandwidth vs. clock speed.
The “official” name for DDR memory is based on its bandwidth rather than clock speed. The easy method to convert data rate to bandwidth is to multiply by eight. Thus, DDR-400 is called PC-3200; DDR2-800 is called PC2-6400 and DDR3-1600 is called PC3-12800.
12. Where to purchase Memory (RAM)?
Next, you’ll need to purchase the RAM. Paying a few dollars more to buy RAM from a reliable manufacturer like Crucial, Kingston, and Corsair might be worthwhile, as RAM quality isn’t the place to save a few bucks. You can buy RAM directly online from the manufacturer, although you might get a better price elsewhere and manufacturers like Crucial and Kingston have good relations with their selected retailers. There are numerous online and physical shops to purchase your RAM sticks from, however a lot of it comes down to personal preference. Each of the big stores does have its own advantages and disadvantages, so here are some of our favourite places to buy:
- From our own (affiliate) traffic analyses, Amazon is – not surprisingly – by far the most popular place to buy RAM from. Amazon is the largest Internet-based retailer in the United States and has separate retail websites in other countries. Amazon also offers international shipping to certain other countries for some of its products. They offer free US Shipping on orders over $35. Prices are usually similar or cheaper to other stores, and with Amazon Prime
 (which is well worth the price), shipping is faster and cheaper too. Their return policy is also great and their website is super easy to navigate. You can purchase RAM from Amazon directly or use Amazon’s website to buy your memory sticks from third-party sellers. Third-party sellers are independent sellers who offer a variety of new, used, refurbished, and collectible merchandise.
- Newegg.com
 has a solid selection and an amazing search engine. If you don’t know what product you want but you know what specs you want, their power search will find anything that matches your specifications. They also have a multitude of reviews from experienced builders that’ll really help you get something worthwhile.
- If you don’t like Newegg, TigerDirect.com is similar in selection, but without the super powerful search. They also sell their RAM on Amazon: TigerDirect, Inc. RAM Section on Amazon
 .
.
- It’s worth mentioning a real-world store (you know, a shop you have to walk into and buy at the counter). Micro Center in particular is a great store, since they often have attractive deals. You can’t always get these deals on their web site; their whole idea is that deals get you into the store to buy more stuff. Micro Center has 25 Locations Nationwide.
13. Installing your Laptop RAM (Memory) SODIMM Stick
IMPORTANT
- Before you take things apart, make sure to shut down and turn off the computer AND remove the power cable!

- Disconnect all external devices attached to the laptop (like printers, flash drives, and headsets).
- Remove the battery. This will prevent you from accidentally shorting anything on the system board during this process. Pull the two battery latches outwards, then remove the battery.
- Discharge residual power by pressing the power button.
- Ground yourself before handling the RAM to avoid electrostatic discharge. Touch some grounded metal (like a tap) first.
- Try to not touch the contacts on the RAM.
a. Turn the laptop upside down on a flat soft surface.
b. Remove the screw that secures the compartment cover using an
Electronics Repair Screwdriver Set


(#ad or paid links)
..
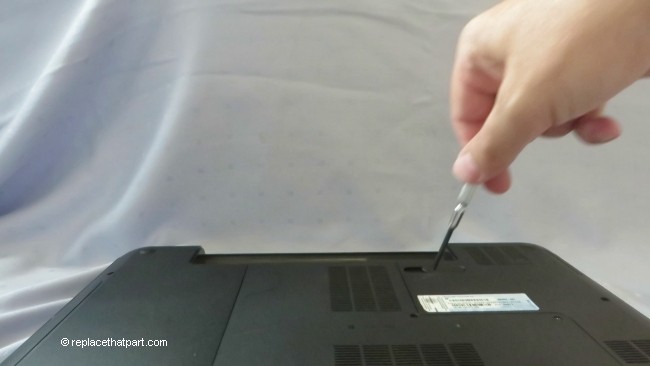
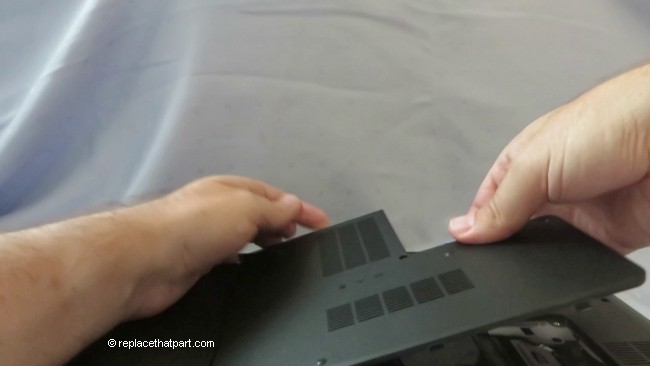
c. Remove the compartment cover.
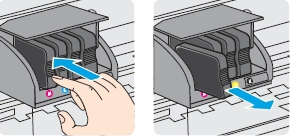
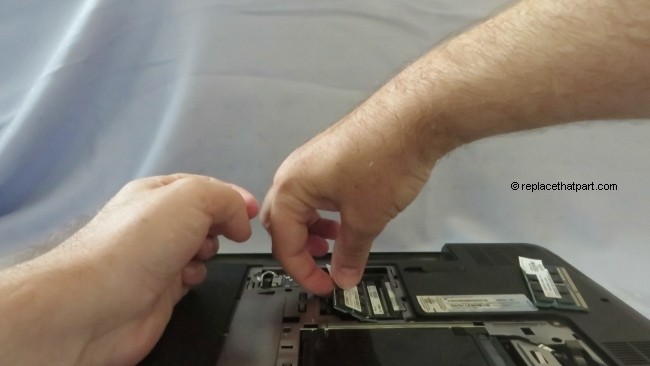
d. If you’re replacing RAM modules, you’ll need to remove the ones currently in your PC. Press outwards on the latches on both edges of the socket at the same time. Remove the SODIMM; it should pop right out. Be sure to save the old SODIMM for future use.
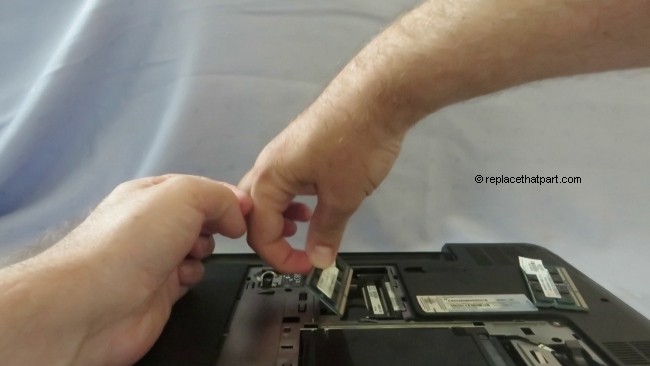
e. Most memory will be sold in a piece of hard, clear plastic. Gently remove the new module from the packaging by pressing on it from the plastic side. Avoid bending the module or applying too much force to the packaging. When you remove the SODIMM memory module from its packaging hold it by the edges, try not to touch the gold colored contacts as this can damage the memory.
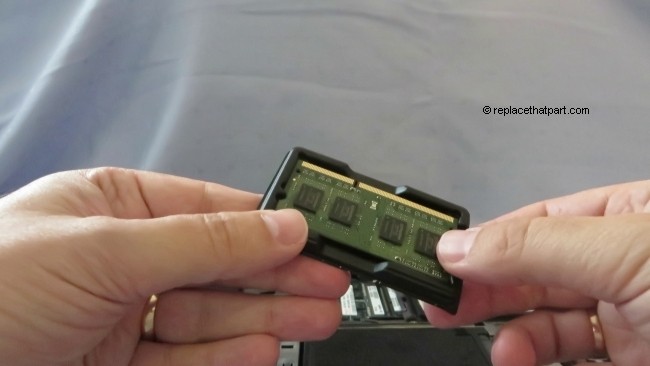
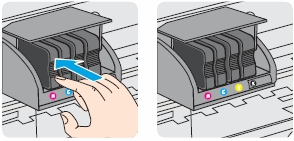
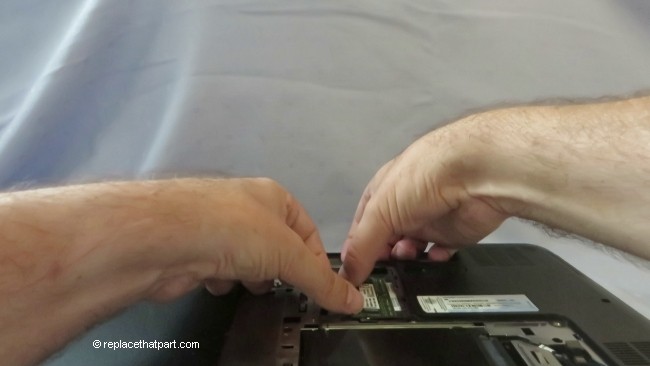
f. Turn the module so the teeth are facing the SODIMM slot and the sticker is face down. It’s impossible to put the memory module in backwards thanks to the notches which “key” it with the slot. Insert the notched end of the SODIMM into the socket. This is important; you want to stick in the new memory module at a 45 degree angle. Press the SODIMM firmly, and pivot it until the clips snap into place.
g. Push the memory module down so that it’s completely fixed and the metal retaining clips clasp into the grooves on either side of the module. If the memory does not fit easily, take it out and try again. If necessary, push the SODIMM module down, while puling the memory module latches outward. The module should usually be seated so that you don’t see any of the gold contacts.
h. Before you close your case, replace the battery. Just slide the battery into the system. The battery latches move inwards and fix the battery automatically.
Test it.
i. Turn your computer back on. The BIOS automatically detects the amount of memory in the system and configures CMOS accordingly during the Power-On Self-Test (POST) process. There is no hardware or software (including BIOS) setup required after the memory is installed. You should see the new amount of memory displayed on your start-up screens or in the properties for “My Computer”. Right click on the “My Computer” icon and select “properties”. The screen which appears should show approximately the new ammount of RAM. The memory capacity reported in Windows might be less than the actual capacity of memory. This is because BIOS or the onboard graphics uses a portion of memory or claims it for further use.
If you don’t see approximately the new ammount of RAM in “My Computer”, reboot and press F2 repeatedly until you get to the BIOS screen. It will then see the right ammount of Gig.
j. If everything works correctly, you are done and you can reinstall the memory compartment cover. If you have any problems, go to step 13 for troubleshooting tips.
13. Troubleshooting. If you have trouble with your new RAM, check these things first. Check the power cords. Is everything plugged in properly? Check the module. Did both side tabs snap to hold the module firmly in place? Try removing the module and replacing it to make sure it is seated properly in the slot. If you’re still having difficulties with your RAM, check the Crucial FAQ section. You may find an easy solution for your problem.
14. Close the memory compartment cover and fasten te screws.

Enjoy!
 For your US HP ENVY 4520 All-in-One series Printer you need
 For your European or UK HP ENVY 4520 All-in-One series Printer you need HP 302 or HP 302XL cartridges.