Make sure you purchase the right ink cartridges for your specific printer and printer region or have your old ones refilled. Cartridges are not compatible between different brands, and often not within the same brand. HP often designs its inkjet hardware to use country-specific consumables. When you unbox a new HP inkjet printer and set it up, you install a set of ink tanks that ship with the printer. As you turn on the device and get ready to use it, an initialization sequence localizes it to the country associated with the ink cartridges you installed. HP recommends that you use original HP ink cartridges.
XL (Extra Large) cartridges cost more but do provide better value in the long run. They will be able to print at least double the pages of a regular cartridge. Our advice is that if you print often, go with XL. However, ink can dry up. So if you are not a frequent printer, go with the regular cartridges.
You can check the estimated ink levels from the printer control-panel, from the printer Toolbox, and the embedded Web server (EWS).
A. To check the estimated ink levels from the display.
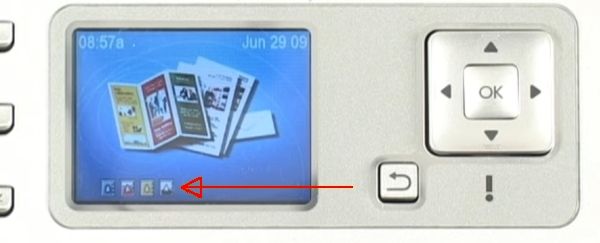
The color display of the HP Officejet Pro L7680 shows ink level icons at the bottom of the display. The color of the icon corresponds to the color of the ink cartridge, and the fill level of the icon corresponds to the fill level of the ink cartridge.
B. To check the estimated ink levels from the printer Toolbox (Windows).
– Open the Toolbox: From the HP Solution Center, click the Settings menu, point to Print Settings, and then click Printer Toolbox.
– Click the Estimated Ink Levels tab to view the inklevel information, and then scroll to display the Cartridge Details button. Click the Cartridge Details button to view information about replacement ink cartridges.
C. To check the estimated ink levels from the embedded Web server.
The embedded Web server contains pages that you can use to view product information and change device settings. The pages also contain links to other e-services. The Information page shows status information about the device, its ink supplies and usage, and a log of device events (such as errors).
Ink level warnings and indicators provide estimates for planning purposes only. Consider getting replacement print cartridges when you receive a low-ink warning message. This avoids possible printing delays. You do not need to replace the print cartridges until print quality becomes unacceptable.
Which ink cartridges do I need for my HP Officejet Pro L7680 All-in-One Printer?


 For your US, European and UK HP Officejet Pro L7680 All-in-One Printer you need HP 88 Black (OR HP 88XL Black) AND 3 color cartridges: HP 88 Cyan, HP 88 Magenta and HP 88 Yellow (OR the XL-versions). There are also Combo Packs (3 cartridges in one pack) available, like the HP 88XL Value Combo Pack Cyan Magenta and Yellow High Yield Original Ink.
Try Amazon's ink selector tool to find compatible ink cartridges for your printer.
Replace the ink cartridges
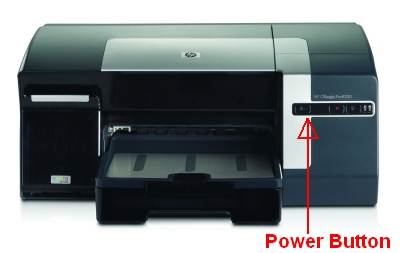
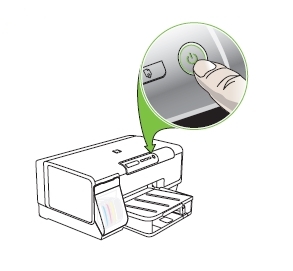
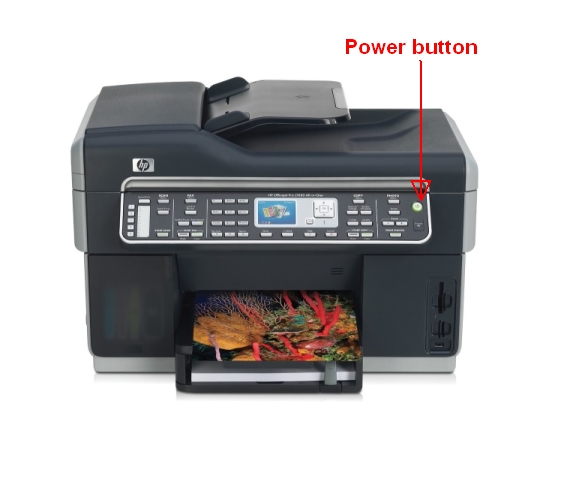
1. Press the power button to turn on the printer, if it is not already on. Wait until the product is idle and silent before continuing. When the device is turned on for the first time, it takes approximately 12 minutes to initialize it after the printheads are installed.
2. Load plain unused Letter or A4 white paper in the input tray.
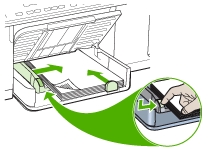
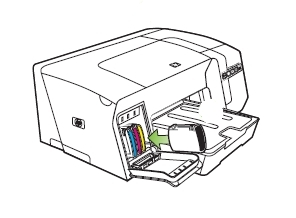
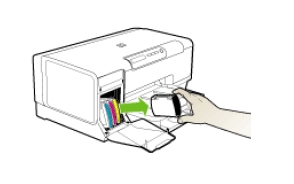
Remove the old cartridge
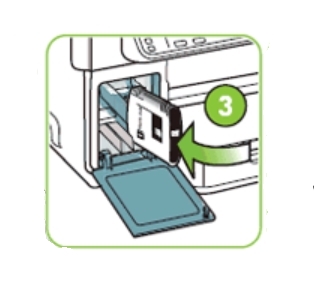
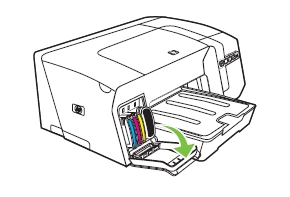
3. Gently pull open the ink cartridge cover.

4. Remove the ink cartridge that requires replacement by grasping it between your thumb and forefinger and pulling it firmly toward you.
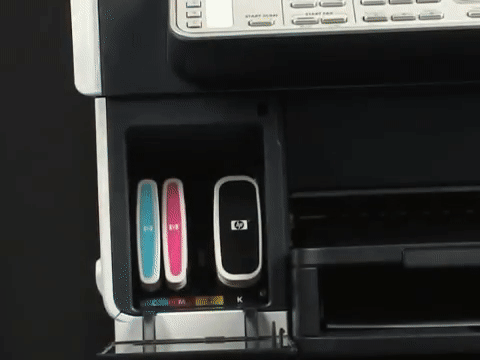
Note: Your HP Officejet Pro L7680 All-in-One printer may not look exactly like the picture below, but the cartridge numbers and cartridge system are the same.
(Please wait for the video to load)
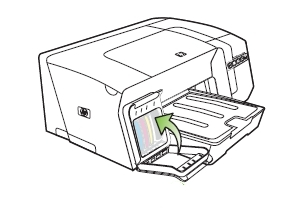
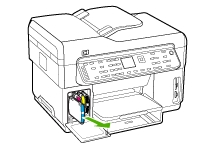
Insert a new cartridge
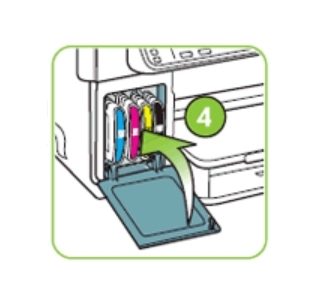
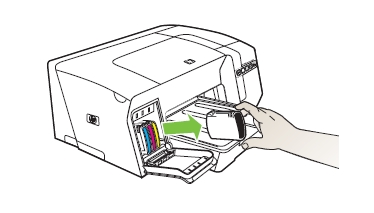
5. Remove the new ink cartridge from its package. Be careful to touch only the plastic on the cartridge. Do NOT touch the electrical contacts and ink port.

6. Hold the cartridge by its sides with the nozzle toward the product, and then insert the cartridge into its color-coded slot. Press the cartridge forward into the slot until it snaps into place. Press down firmly on the cartridge to ensure proper contact.

7. If more than one cartridge is low on ink, repeat the steps to insert the other cartridges.
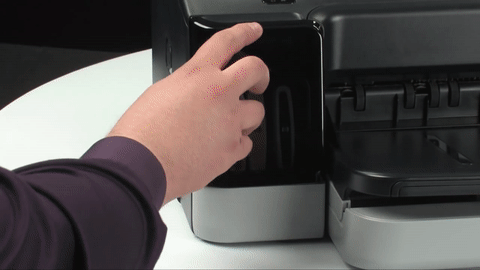
8. Close the ink cartridge cover.

(Please wait for the video to load)

Align the printhead only if necessary.
Whenever you replace a cartridge or printhead, the device automatically aligns the printheads to ensure the best print quality. However, if the appearance of your printed pages indicates that the printheads are misaligned, you can start the alignment process manually. You can align the printhead from the printer control panel, from the HP printer software and from the embedded web server (EWS).
– Control panel: Press the Setup button, select Tools, select Align Printer, and then press OK. Press OK when the alignment is done to continue.
– Embedded Web server (EWS): Click the Settings tab, click Device Services in the left pane, select Align Printheads from the drop-down list in the Print Quality section, and then click Run Diagnostic.
– Toolbox (Windows): Click the Services tab, and then click Align Printheads and follow the onscreen instructions.