Make sure you purchase the right ink cartridges for your specific printer and printer region or have your old ones refilled. Cartridges are not compatible between different brands, and often not within the same brand. HP often designs its inkjet hardware to use country-specific consumables. When you unbox a new HP inkjet printer and set it up, you install a set of ink tanks that ship with the printer. As you turn on the device and get ready to use it, an initialization sequence localizes it to the country associated with the ink cartridges you installed. HP recommends that you use original HP ink cartridges.
XL (Extra Large) cartridges cost more but do provide better value in the long run. They will be able to print at least double the pages of a regular cartridge. Our advice is that if you print often, go with XL. However, ink can dry up. So if you are not a frequent printer, go with the regular cartridges.
You can easily check the ink supply level to determine how soon you might need to replace an ink cartridge. The ink supphttps://replacethatpart.com/wp-admin/upload.phply level shows an estimate of the amount of ink remaining in the ink cartridges.
To check the ink levels from the HP printer software (Windows)
– Open the HP printer software.
– In the printer software, click the Estimated Ink Levels tab.
Ink level warnings and indicators provide estimates for planning purposes only. When you receive a low-ink warning message, consider having a replacement ink cartridge available to avoid possible printing delays. You do not have to replace the ink cartridges until the print quality is unacceptable. You can use the single-cartridge mode to operate the DeskJet Ink Advantage 1115 with only one ink cartridge. The single-cartridge mode is initiated when an ink cartridge is removed from the ink cartridge carriage.
Which ink cartridges do I need for my DeskJet Ink Advantage 1115 Printer?

 For your European or UK DeskJet Ink Advantage 1115 Printer you need HP 652 cartridges.
Note
This printer is sold at Amazon.com as HP Photosmart 1115 Inkjet Printer, but this model was discontinued a decade ago. It is the HP DeskJet Ink Advantage 1115 Printer, a low-cost printer with low-cost ink. This printer is normally unavailable for purchase in the United States. You can’t buy ink for it at HP.com (US). You should always install the same cartridges which came in the box at delivery (assuming you’ve installed these cartridges at setup). The HP DeskJet Ink Advantage 1115 Printer accepts the following cartridges at setup:
| HP 652 | Europe, Middle East, and Africa |
| HP 664 (click here) |
Latin America |
| HP 680 | Asia Pacific |
HP 664 (click here) compatibale cartridges are available at Amazon.com (US), but these are third-party cartridges, not original HP cartridges and they are quite expensive.
Try Amazon's ink selector tool to find compatible ink cartridges for your printer.
Replace the ink cartridges
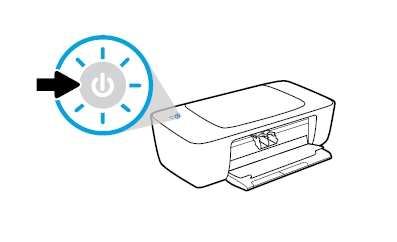
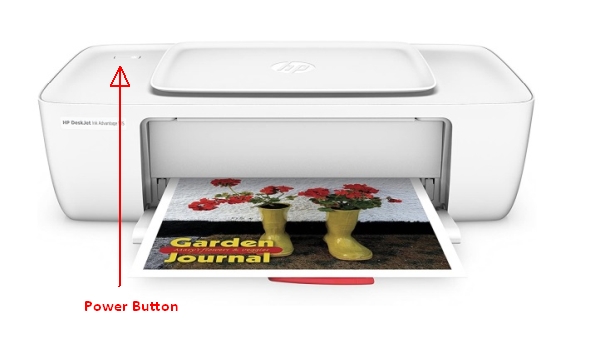
1. Press the Power button to turn on the printer, if it is not already turned on.
2. Load unused, plain white letter or A4-sized paper in the tray, if you have not already done so.
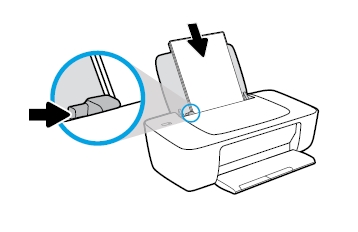
3. Lower the output tray, if it is not already lowered.
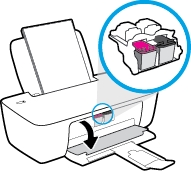
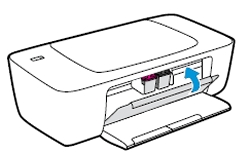
4. Reach inside the printer, grasp the handle, then lower the ink cartridge access door . The carriage moves to the center of the printer. Wait until the carriage is idle and silent before you continue.

Remove the old cartridge
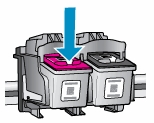
5. Lightly press down on one of the old cartridges to release it, and then pull the cartridge toward you out of its slot. Set it aside for recycling. Remove the cartridge from the slot on the left to replace the tri-color cartridge. Remove the cartridge from the slot on the right to replace the black cartridge.
Insert a new cartridge
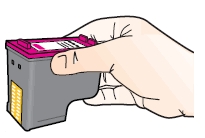
6. Remove the new cartridge from its package. Be careful to only touch the black plastic on the ink cartridge by holding the ink cartridge by its sides.
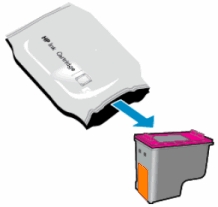
7. Remove the plastic tape using the pull tab.

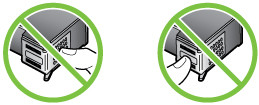
Do NOT:
– Remove the copper electrical strip.
– Touch the copper-colored contacts or the ink nozzles.
– Replace the protective tape on the contacts.
8. Hold the ink cartridge by its sides with the nozzles toward the printer, then insert the ink cartridge into its correct slot. Slide the ink cartridge at a slightly upward angle into the empty slot, then gently push up on the ink cartridge until it snaps into place. Repeat these steps to install the other ink cartridge, if necessary. Insert the tri-color ink cartridge into the left slot. Insert the black ink cartridge into the right slot.
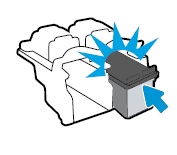
9. Close the ink cartridge access door.
Align the cartridges
10. The printer automatically prints an alignment page. The printer only prints an alignment page automatically when new ink cartridges are installed. If your printer did not automatically print an alignment page, you can align the ink cartridges from your computer using the HP software. Your alignment test page might be different from the one pictured. Examine the alignment page to see if the printer is properly aligned. If the patterns on the alignment test page are faded, streaked, or smeared, check the estimated ink levels and clean the printhead.
