Make sure you purchase the right ink cartridges for your specific printer and printer region or have your old ones refilled. Cartridges are not compatible between different brands, and often not within the same brand. HP often designs its inkjet hardware to use country-specific consumables. When you unbox a new HP inkjet printer and set it up, you install a set of ink tanks that ship with the printer. As you turn on the device and get ready to use it, an initialization sequence localizes it to the country associated with the ink cartridges you installed.
HP recommends that you use original HP ink cartridges. XL (Extra Large) cartridges cost more but do provide better value in the long run. They will be able to print at least double the pages of a regular cartridge. However, (original) HP XL cartridges for the HP Deskjet 5940 printer are NOT available. Basically HP 96 and HP 97 are XL versions of HP 98 and 95 cartridges.
Follow these instructions to view the estimated ink levels of the print cartridges that are installed in the printer:
– Open the HP Printer Utility.
– Select Supplies Status.
Ink level warnings and indicators provide estimates for planning purposes only. When you receive a low-ink warning message, consider having a replacement ink cartridge available to avoid possible printing delays. You do not have to replace the ink cartridges until the print quality is unacceptable.
Use the ink-backup mode to operate the Deskjet 5940 with only one ink cartridge. The ink-backup mode is initiated when an ink cartridge is removed from the print cartridge cradle. Printing in ink-backup mode slows the printer and affects the quality of printouts. HP does not recommend using the photo print cartridge or the gray photo print cartridge for ink-backup mode.
Print cartridge combinations
Three print cartridges can be used with the printer. For everyday printing: Use a black cartridge along with a tri-color cartridge. For printing color photos: Use a photo cartridge along with a tri-color cartridge. Always install the tri-color print cartridge in the left side of the print cartridge cradle. Install the black OR photo print cartridge in the right side of the print cartridge cradle.
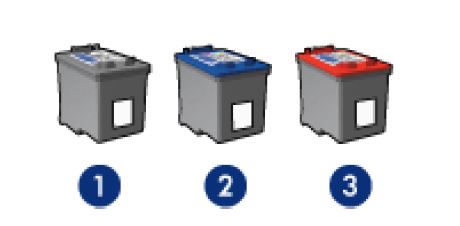
1. Black print cartridge
2. Tri-color print cartridge
3. Photo print cartridge
So, which ink cartridges do I need for my HP Deskjet 5940 Printer?
 For your US HP Deskjet 5940 Printer you need HP 96 Black AND HP 97 Tri-color cartridges OR the smaller HP 98 Black AND HP 95 Tri-color cartridges. There are also 2-Packs available, like the HP 98 Black and 95 Tri-color Original Ink Cartridges, 2 Cartridges. Check the price of HP 96 and HP 97 cartridges at Amazon.com .
For printing photos use HP 99 Photo Original cartridges.

 For your European or UK HP Deskjet 5940 Printer you need HP 339 Black AND HP 344 Tri-color cartridges OR the smaller HP 337 Black AND HP 343 Tri-color cartridges.
There are also 2-Packs available, like the HP 338 Black/343 Tri-color 2-pack Original Ink Cartridges.
For printing photos use HP 348 Photo cartridges.
Try Amazon's ink selector tool to find compatible ink cartridges for your printer.
Replace the ink cartridges
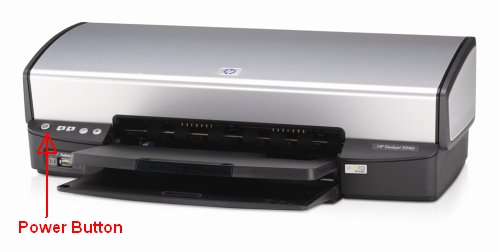
1. Press the power button to turn on the printer, if it is not already on.
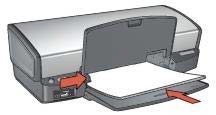
2. Load plain unused Letter or A4 white paper in the input tray.
Remove the old cartridge
3. Open the printer cover. Wait until the print cartridge cradle is idle and silent before you continue.
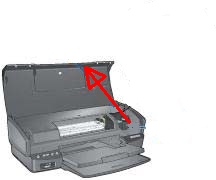
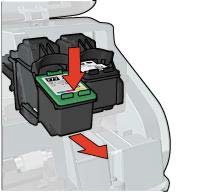
4. Press down on the cartridge to release it, and then pull it toward you out its slot. Remove the cartridge from the slot on the left to replace the color cartridge. Remove the cartridge from the slot on the right to replace the black OR photo cartridge.
Insert a new cartridge
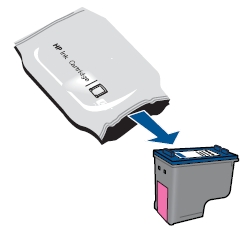
5. Remove the new cartridge from its package. Be careful to touch only the black plastic on the cartridge.
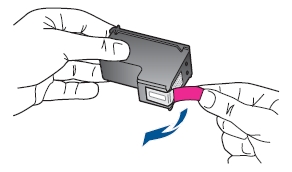
6. Remove the plastic tape using the pull tab.
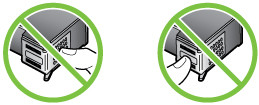
Do NOT:
– Remove the copper electrical strip.
– Touch the copper-colored contacts or the ink nozzles.
– Replace the protective tape on the contacts.
7. Hold the cartridge by its sides with the nozzles toward the printer, and then slide the print cartridge at a slight upward angle into its slot. Push the cartridge forward into its slot until it snaps into place. Make sure that the cartridge is inserted in the correct slot. The tri-color cartridge goes in the slot on the left. The black cartridge OR photo goes in the slot on the right.
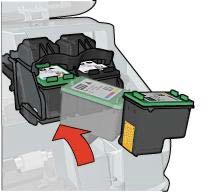
8. Repeat step 4 through 7 to replace the other cartridge, if necessary.
9. Close the cartridge access door. The printer automatically prints a calibration page.
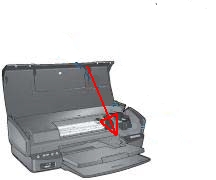
Align the printer
The printer automatically aligns the print cartridges after a new print cartridge is installed. You can also align the print cartridges at other times to ensure optimal print quality.
– Open the HP Printer Utility (the HP Software).
– Select Align.
– Click the Align button, and then follow the onscreen instructions.
Perform a color calibration if the colors in photos that are printed with the photo print cartridge consistently look incorrect. Verify that a photo print cartridge is installed in the printer. Before performing a color calibration, align the print cartridges, and then reprint the photo. If the color is still incorrect, perform a color calibration from the HP Printer Utility.

 For your US HP Deskjet 5940 Printer you need HP 96 Black AND HP 97 Tri-color cartridges OR the smaller HP 98 Black AND HP 95 Tri-color cartridges. There are also 2-Packs available, like the HP 98 Black and 95 Tri-color Original Ink Cartridges, 2 Cartridges. Check the price of
 For your European or UK HP Deskjet 5940 Printer you need HP 339 Black AND HP 344 Tri-color cartridges OR the smaller HP 337 Black AND HP 343 Tri-color cartridges.


