Make sure you purchase the right ink cartridges for your specific printer and printer region or have your old ones refilled. Cartridges are not compatible between different brands, and often not within the same brand. Keep both new and used print cartridges out of the reach of children.
HP recommends that you use original HP ink cartridges. XL (Extra Large) cartridges cost more but do provide better value in the long run. They will be able to print at least double the pages of a regular cartridge. Our advice is that if you print often, go with XL. However, ink can dry up. So if you are not a frequent printer, go with the regular cartridges.
If you are in the middle of printing, and you change a print cartridge, your current print job may be cancelled. Once the print cartridges are installed in the printer, do not remove them unless they need to be manually cleaned. This prevents ink from evaporating or clogging the print cartridges. When a print cartridge is empty, leave the empty print cartridge in the print cartridge cradle until it is replaced. The HP Deskjet 6120 6122 series Printer requires both print cartridges to operate. If the Print Cartridge Status light continues to blink after installing a new print cartridge, verify the part number on the cartridge matches one of the part numbers shown below.
Which ink cartridges do I need for my HP Deskjet 6120 / 6122 series Printer?


 For your European, UK and US HP Deskjet 6120 / 6122 series Printer you need an HP 45 Black AND an HP 78 Tri-Color cartridge. Only the Tri-Color cartridge is available in XL. There are also Combo Packs (2 cartridges in one pack) available, like the HP 45/78 Ink Cartridge in Retail Packaging, Combo Pack.
Try Amazon's ink selector tool to find compatible ink cartridges for your printer.
Replace the ink cartridges
1. Press the Power button to turn on the printer.
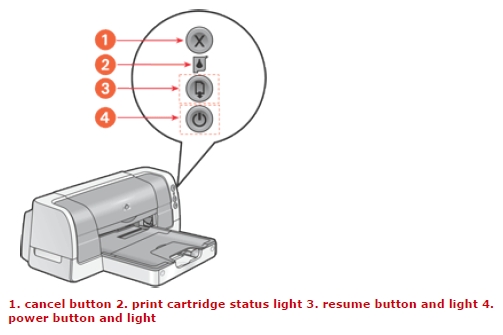
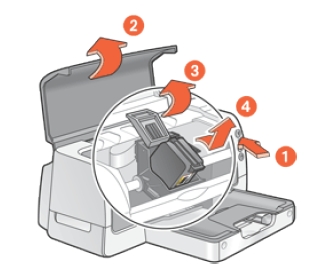
2. Open the top cover.
The cradle moves to the center of the printer.
3. Raise the cradle latch.
4. Lift the print cartridge out of the print cartridge cradle to remove.
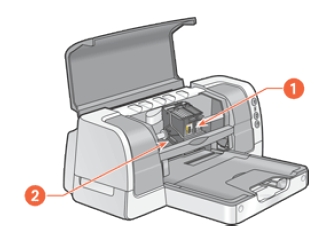
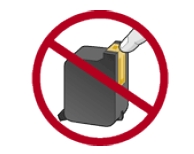
5. Remove the replacement print cartridge from its packaging and carefully remove the plastic tape.
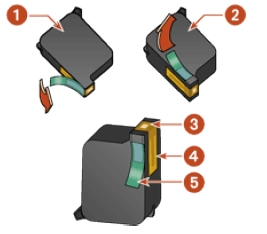
Do not touch the print cartridge ink nozzles or copper contacts. Touching these parts will result in clogs, ink failure, and bad electrical connections. Do not remove the copper strips. They are required electrical contacts.
6. Push the print cartridge firmly into the cradle. The color cartridge is on the left, and the black cartridge is on the right.
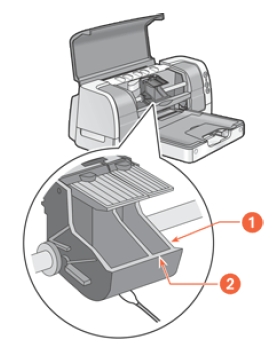
7. Secure the cradle latch.
8. Close the top cover.
A calibration page prints to align the print cartridges.
After you install a print cartridge, the printer automatically calibrates the print cartridges to ensure the best print quality. However, if the black and color print cartridges become misaligned during the course of printing, you may wish to manually calibrate the cartridges. The instructions for calibrating the print cartridges vary according to how the printer was installed on your computer.
