Make sure you purchase the right battery for your tablet. Batteries are not compatible between different brands, and often not among tablets within the same brand.
Which battery do I need for my Samsung Galaxy Tab 2 7.0 tablet?
For your Samsung Galaxy Tab 2 7.0 you need a a 3.7V/4000mAh lithium-ion rechargeable battery (sometimes called a Li-ion battery or LIB): Generic Battery For Samsung P3110 Galaxy Tab 2 7.0.
To be sure you purchase the right battery, check the exact model number of your tablet as the same device (e.g. Samsung Galaxy Tab 2 7.0) can have several different model numbers. In Android: Apps > Settings (gear icon) > About device > Model number.
Some replacement batteries come with tools to open the tablet. If not, you might consider purchasing a special opening and pry tool kit separately, like this one: New Repair Opening Pry Tools Screwdriver Kit Set for iPhone 3G/ 4S / 4 / iPod / iPad / Samsung / HTC .
Replace the Battery
First, remove the memory card (if you have installed one) and turn off the power.
1. Ensure that the device is not currently accessing the memory card. Do not remove a memory card while the device is transferring or accessing information, as this could result in loss of data or damage to the memory card or device.
2. Before removing a memory card, first unmount it for safe removal.
In the application list, select Settings > Storage > Unmount SD card > OK.
3. Turn off the power so that you won’t lose any stored information. If the device is on, press and hold the power button on the right side of the device and then tap Power off.
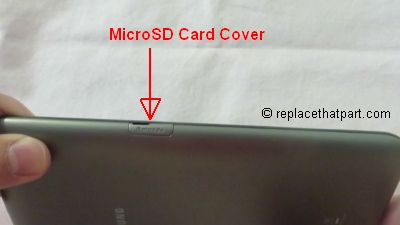
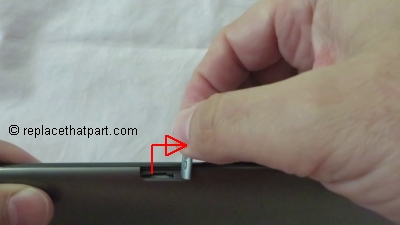
4. Locate and open the microSD card cover on the left side of your device. Use your finger nail to gently pull the cover out and turn it upward.
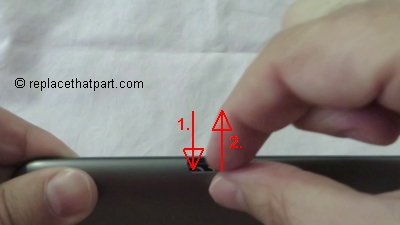
5. Push the memory card gently inward until it disengages from the device.
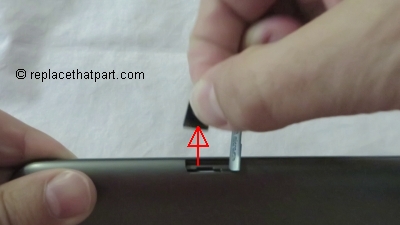
6. Remove the memory card.
Remove the back cover.
Removing the back cover, even with the tools provided, is quite difficult when you consider how easy a phone’s cover removes. Be patient and careful. If you’re in a hurry, you might damage the device or even injure yourself. Removing the back cover might take 10 minutes or more. Prepare your tablet by placing it upside-down on a flat surface with some form of soft padding.
Tools needed:
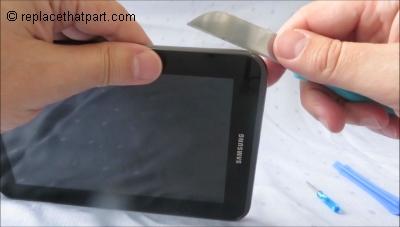
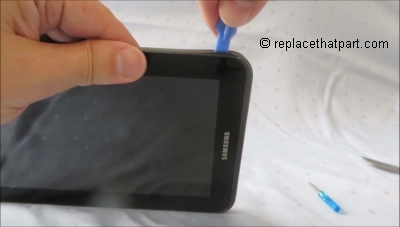
– Plastic Opening Pry Tool.
– Potato peeler. Use this with care and only if you do NOT succeed in creating the first open space between the front and rear panel using other special tools.
– Precision Phillips Screwdriver.
7. Insert one of the plastic opening tools and carefully pry around the tablet to separate the front and rear panels. There are clips on the back panel you will need to release while you moving around the tablet. Apply pressure to separate the clips that hold the back cover and the rest of the device together. You may need to go around the device several times carefully applying force for it to come apart. If you do NOT succeed in creating the first opening, use a potato peeler for this (at your own risk). Be patient and careful. If you’re in a hurry, you might damage the device or even injure yourself. Removing the back cover might take 10 minutes or more.
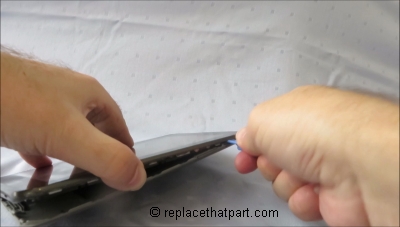
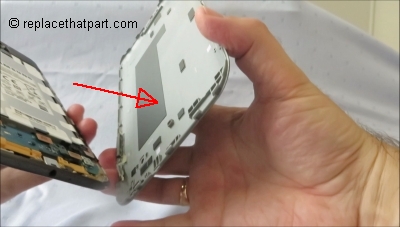
Remove the old battery.
Congratulations! Once you have removed the back cover, the most difficult part of the job has been done. Now you can remove the old battery.
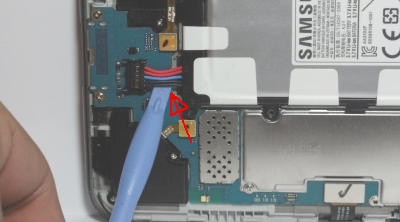
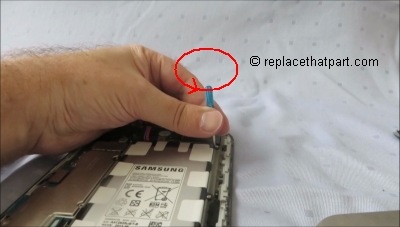
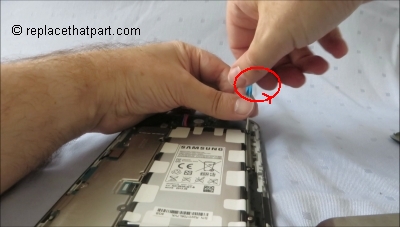
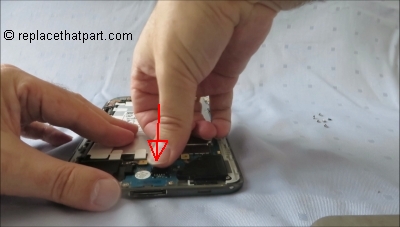
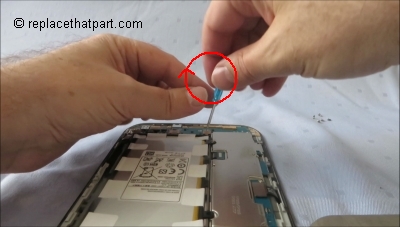
8. The battery has a cable with a connector. First remove the connector from the board by placing a plastic opening tool under the wires and gently prying it straight up out of the socket.
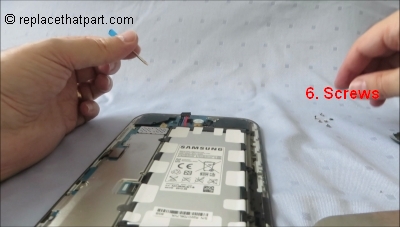
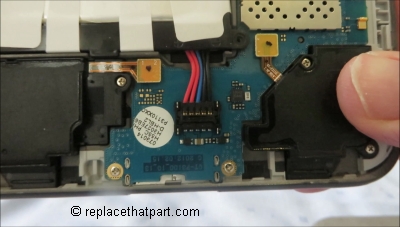
9. Using the Phillips precision screw driver remove the six screws holding the battery in place.
10. Now you can simply remove the battery from the device. Just lift it upwards and pull it away from your device.

Install the new battery.
Once you have removed the old battery, the rest of the process is easy.
11. Simply hook your new battery’s connector back into the port from which you just extricated the old battery. When you are placing in the new battery, it helps to connect the socket first or else it becomes difficult to properly align once the battery is in place.
12. Put the screws back in. Some people have reported that the frame holding the battery was not exactly compatible with their tablet. The screw holes did not match up 100% with the screw slots in the device. In that case you can try to make it fit, replace one or two screws slightly slanted or even abstain from using one or two of the screws.
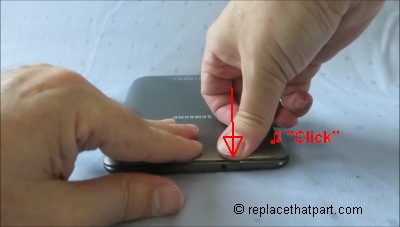
13. Replace the back cover. Line up the hole above the Samsung logo with the camera lens. Press the cover down and press around the sides of the tablet firmly until it clicks into place. Now, put your tablet upside-down on a flat surface with some form of soft padding and apply pressure until it clicks. Your tablet should now be closed completely and should look like it did before.

14. Press and hold the power button to turn the device on and enjoy the new power!
