Which Memory Card do I need for my Samsung Galaxy Tab2 7.0 tablet?
Make sure you purchase the right Memory Card for your tablet. Your Samsung Galaxy built-in memory is 8GB. Users who demand more memory from their tablet can install an external microSD or microSDHC (High-Capacity) memory card with a maximum capacity of 32 GB. Many micro SD Cards come with an SD Card adapter for compatibility with SD-enabled devices, such as cameras, camcorders and (notebook) computers. Memory cards usually come pre-formatted and do not need to be formatted out of the box.
We recommend storing multimedia files (such as music, videos and pictures) on an external memory card in your device to free up your device’s internal memory for applications. Plus, if you buy a new tablet, you can simply put your external memory card in your new device and all your data is back immediately.
The SD Association defines standard speed classes indicating minimum performance to record video. The class indicates the minimum writing speed: Class 2 = 2 MB/s, Class 4 = 4 MB/s, Class 6 = 6 MB/s, Class 10 = 10 MB/s.
SDHC cards are shipped preformatted with the FAT file system. Your Samsung Galaxy Tab2 7.0 supports only the FAT file structure. If you insert a card formatted with a different file structure, your device will ask you to reformat the memory card. Formatting your memory card on a PC may cause incompatibilities with your device. Format the memory card only on the device. In the application list, select Settings > Storage > Format SD card > Format SD card > Erase everything.
Popular memory cards for this tablet include, but are not limited to: Kingston 8 GB microSDHC Class 4 Flash Memory Card and SanDisk 32GB Class 4 Micro SDHC Memory Card.
A. Insert a Memory Card
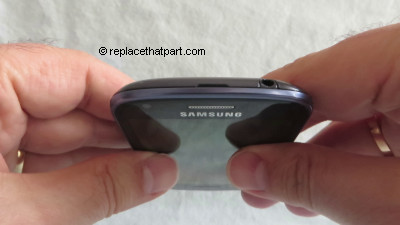
1. Turn off the power so that you won’t lose any stored information. If the device is on, press and hold the power button on the right side of the device and then tap Power off.
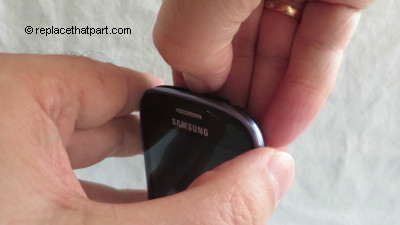
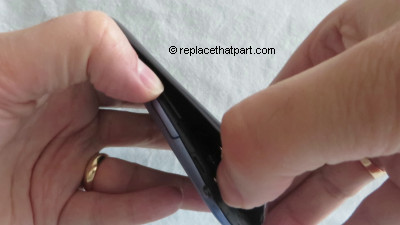
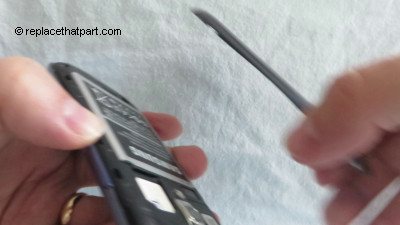
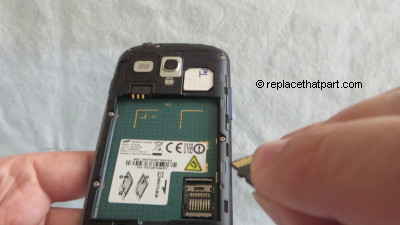
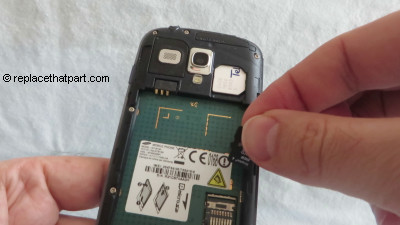
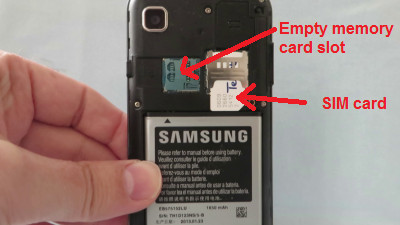
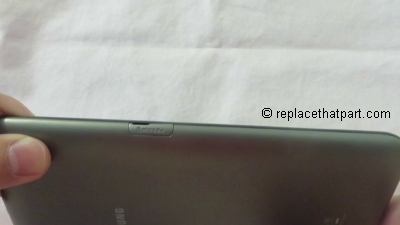
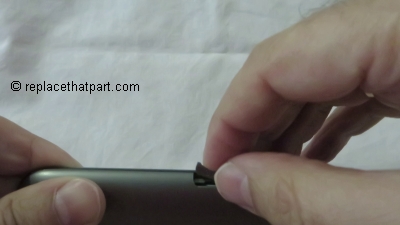
2. Locate and open the microSD card cover on the left side of your device. Use your finger nail to gently pull the cover out and turn it upward.
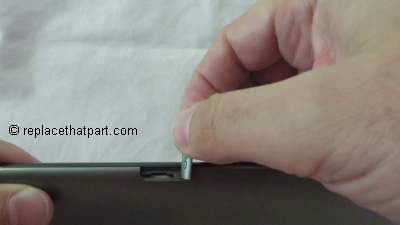
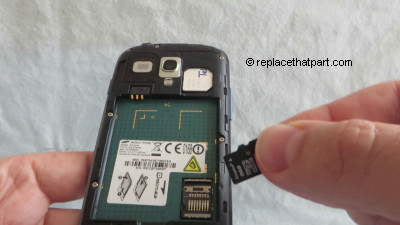
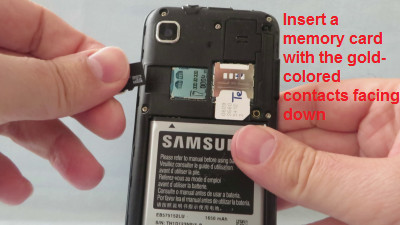
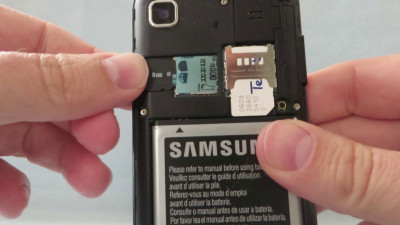
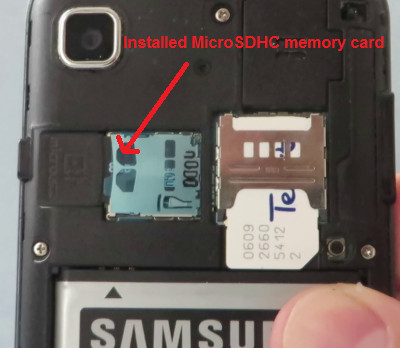
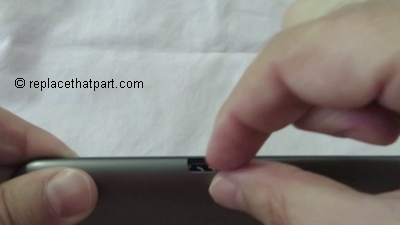
3. Insert a microSD card with the gold-coloured contacts facing downwards, and then push the memory card inward until it locks into place.
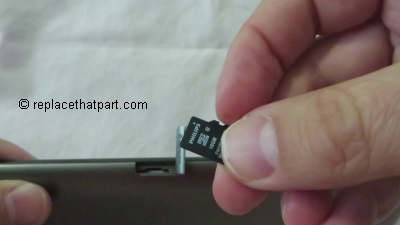
Important: You can easily damage the memory card and card slot by improper operation. Please be careful when inserting, removing, or handling it. Do not over-insert the card as this can damage the contact pins.
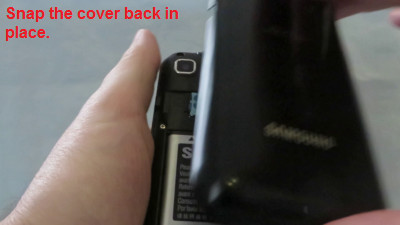
4. Close the microSD card cover.
B. Remove a Memory Card
1. Ensure that the device is not currently accessing the memory card. Do not remove a memory card while the device is transferring or accessing information, as this could result in loss of data or damage to the memory card or device.
2. Before removing a memory card, first unmount it for safe removal.
In the application list, select Settings > Storage > Unmount SD card > OK.
3. Turn off the power so that you won’t lose any stored information. If the device is on, press and hold the power button on the right side of the device and then tap Power off.
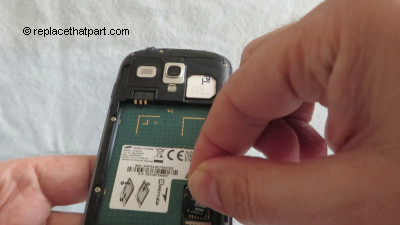
4. Locate and open the microSD card cover on the left side of your device. Use your finger nail to gently pull the cover out and turn it upward.
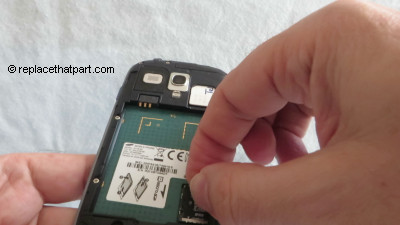
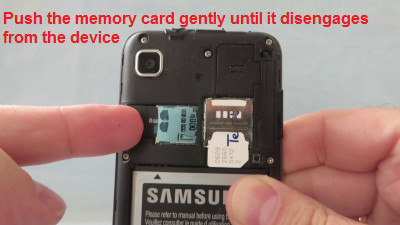
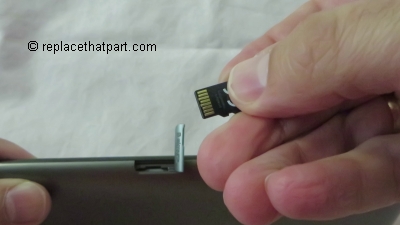
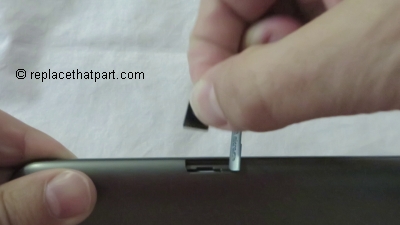
5. Push the memory card gently inward until it disengages from the device.
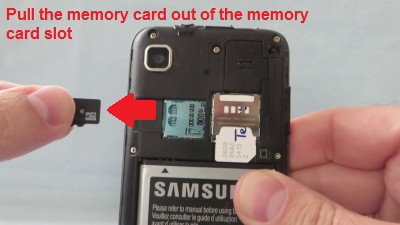
6. Remove the memory card.
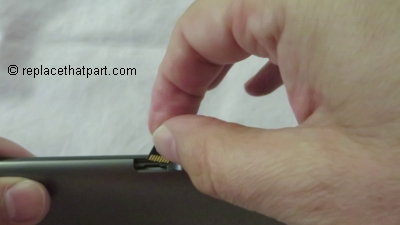
6. Close the cover of the memory card slot.