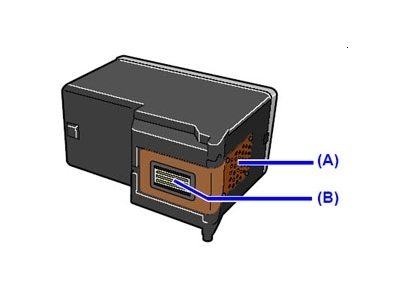
Make sure you purchase the right ink cartridges for your specific printer and printer region or have your old ones refilled. Cartridges are not compatible between different brands, and often not within the same brand. Canon recommends that you use original Canon ink cartridges. If the cartridges are labeled as Canon FINE Cartridges, the cartridges have a mechanical printhead built into the cartridge, instead of being installed into the printer.
Check the estimated ink levels
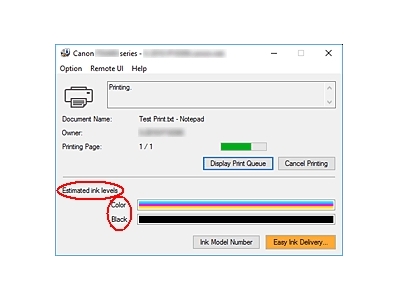
You can check the estimated ink levels from the printer operation panel and from the Canon printer software. The ink level detector is mounted on the printer to detect the remaining ink level. The printer considers as ink is full when a new cartridge is installed, and then starts to detect a remaining ink level. If you install a used cartridge, the indicated ink level of it may not be correct. In such case, refer to the ink level information only as a guide.
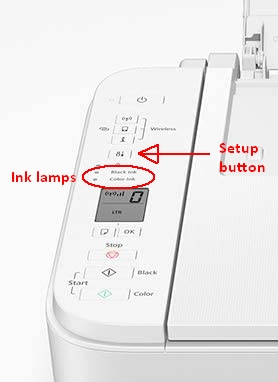
To check the ink status with the ink lamps on the operation panel:
In the copy standby mode, you can check the ink status with the color ink lamp and black ink lamp. If the color ink lamp or the black Ink lamp lights, the ink is running low. Prepare a new ink cartridge. The resulting print quality may not be satisfactory, if printing is continued under this condition.
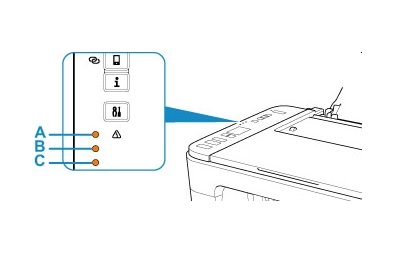
A: Alarm lamp
B: Black Ink lamp
C: Color Ink lamp
To check the ink levels from the printer software (Windows):
Open the printer driver setup window:
– Select the print command from your application software. The Print command can generally be found in the File menu.
– Select your printer model, and click Preferences or Properties. The printer driver’s setup screen appears.
You can also display the printer driver’s setup screen by clicking the printer icon:
– Select Control Panel -> Hardware and Sound -> Devices and Printers.
– Right-click the icon of your model. When the menu appears, select Printing preferences.
Canon IJ Status Monitor
The Canon IJ Status Monitor displays the printer status and the printing progress. You can also use it to check the remaining ink level and the cartridge types for your model. The Canon IJ Status Monitor launches automatically when print data is sent to the printer. When launched, the Canon IJ Status Monitor appears as a button on the task bar. Click the button of the status monitor displayed on the task bar. The Canon IJ Status Monitor appears. To open the Canon IJ Status Monitor when the printer is not printing, open the printer driver setup window and click View Printer Status on the Maintenance tab.

Canon sells most of their cartridges in a standard yield size and a high yield or XL. Some printers also use extra-high yield, or XXL cartridges. All cartridge sizes are the exact same size and install in your printer the same way, the only difference is the amount of ink that is inside the cartridge. XL (Extra Large) cartridges cost more but do provide better value in the long run. They will be able to print at least 30% to 50% more pages than a regular cartridge. Our advice is that if you print often, go with XL. However, ink can dry up. So if you are not a frequent printer, go with the regular cartridges. A new Canon printer includes a complete set of starter ink cartridges. Starter cartridges are filled with less ink than a standard yield cartridge so you shouldn’t expect to get many prints out of them before they need to be replaced.
Ink level warnings and indicators provide estimates for planning purposes only. When you receive a low-ink warning message, consider having a replacement cartridge available to avoid possible printing delays. You do not have to replace the cartridges until the print quality is unacceptable.
Single cartridge
If an ink cartridge runs out of ink, you can print with either the color or black ink cartridge. However the print quality may be reduced compared to when printing with both cartridges. We recommend to use a new ink cartridge in order to obtain optimum qualities. Even when printing with one cartridge only, print with leaving the empty ink cartridge installed. If either the color ink cartridge or black ink cartridge isn’t installed, an error occurs and the printer can’t print.
Which ink cartridges do I need for my Canon PIXMA TS3322 Wireless All-in-One Printer?
 For your US Canon PIXMA TS3322 Wireless All-in-One Printer you need a Canon PG-243 black cartridge AND a Canon CL-244 color cartridge. Currently, no XL versions of these two cartridges seem to be available. However you may also use Canon PG-245 AND CL-246 cartridges for your TS3322 printer. These cartridges ARE available in XL versions. All cartridges mentioned above are also available in 2-in-one valuepacks.
Try Amazon's ink selector tool to find compatible ink cartridges for your printer.
Replace the ink cartridges
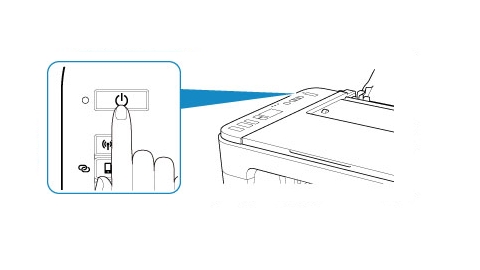
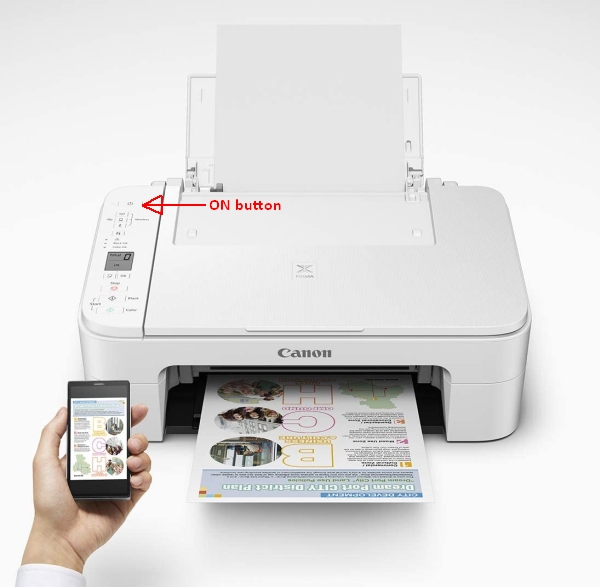
1. Press the ON button to turn on the printer, if it is not already turned on.
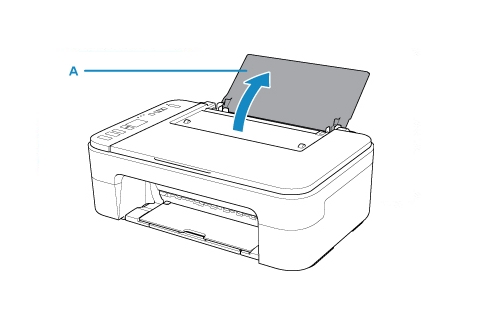
2. Open the paper support (A).
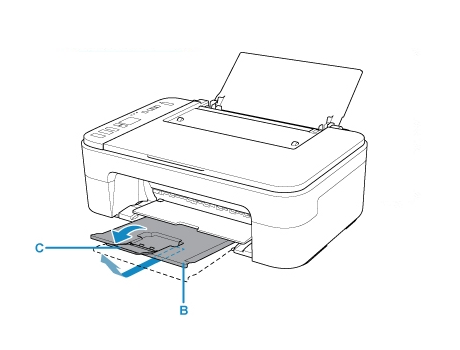
2. Retract the paper output tray (B) and the output tray extension (C).
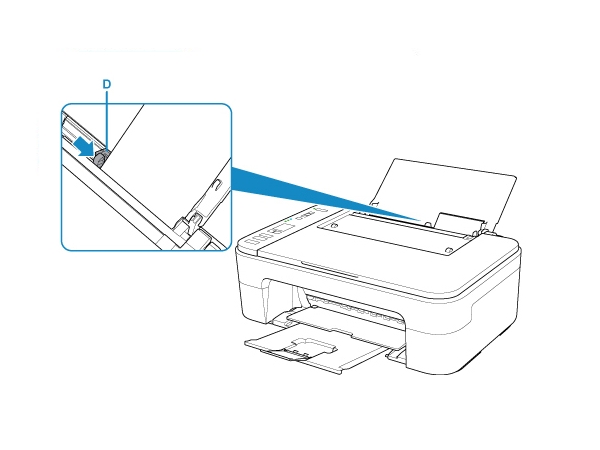
3. Load unused plain white Letter or A4-sized paper on the rear tray. Adjust the paper guide (D) with the paper left side. Do not slide the paper guide too hard against the paper. The paper may not be fed properly.
4. Open the cover. The cartridge holder moves to the replacement position. Wait until the printer is idle and silent before continuing.
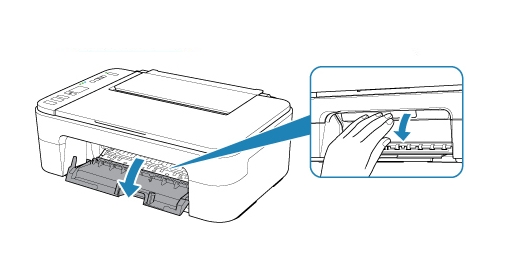
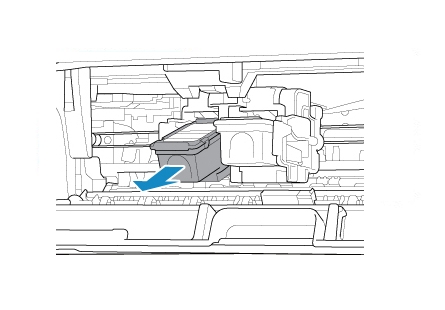
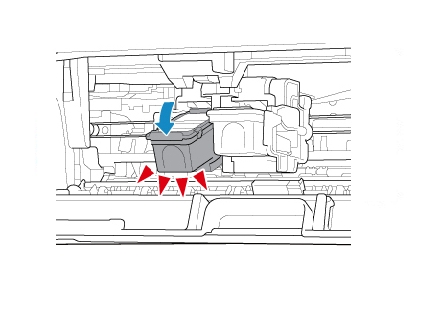
5. Remove the empty cartridge.
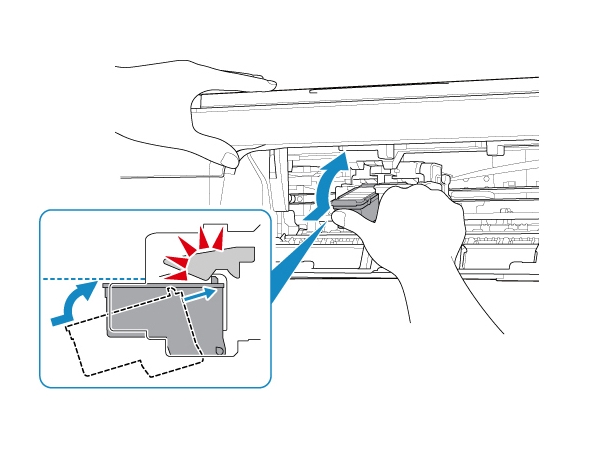
– Push down the ink cartridge lock lever of the empty cartridge until it clicks.
– Remove the empty cartridge.
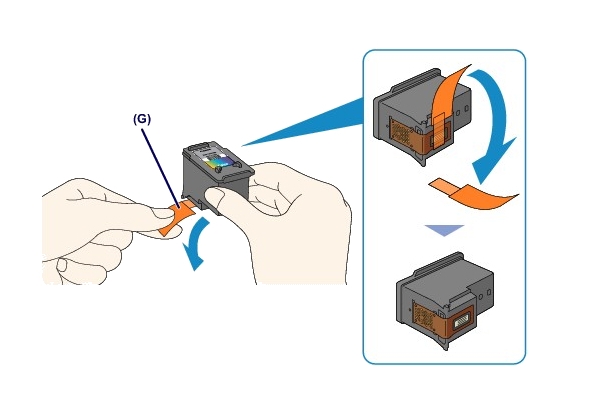
6. Prepare a new cartridge.
– Remove the new cartridge from its packaging. Be careful to only touch the black plastic on the ink cartridge by holding the ink cartridge by its sides.
– Remove the protective tape (G) gently.
Do NOT:
– Remove the copper electrical strip.
– Touch the copper-colored contacts or the ink nozzles.
– Replace the protective tape on the contacts.
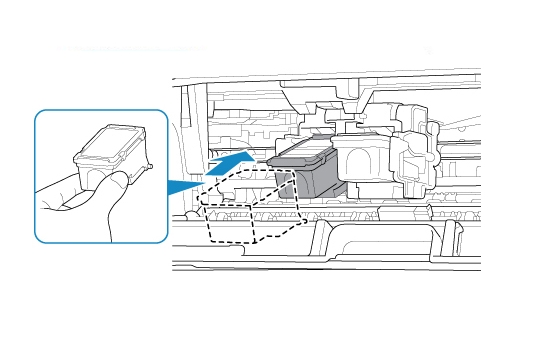
7. Install the new cartridge.
– Insert the new cartridge at a slant into the cartridge holder.
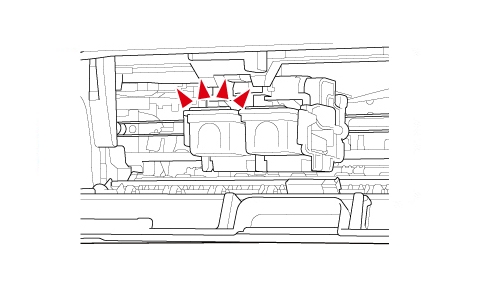
The tri-color cartridge goes in the slot on the left.
The black cartridge goes in the slot on the right.
Push the cartridge in and up firmly until it snaps into place.
8. Check if the cartridge is installed correctly. The printer cannot print unless both the color cartridge and black cartridge are
installed. Be sure to install both cartridges.
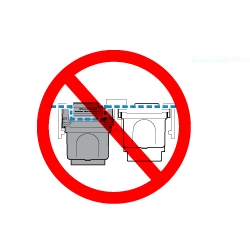
9. Repeat step 5 through 8 to replace the other cartridge, if necessary.
The tri-color cartridge goes in the slot on the left.
The black cartridge goes in the slot on the right.
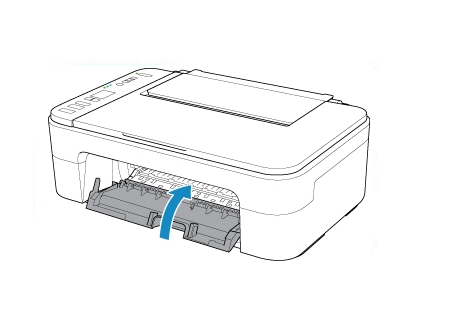
10. Close the cover. If an error code appears on the LCD after the cover is closed, take appropriate action.
Align the cartridges
11. After replacing the cartridge, align the print head.
– Press the Setup button until 4 appears on the LCD.
– Press the Black button OR the Color button. The print head alignment sheet will be printed.
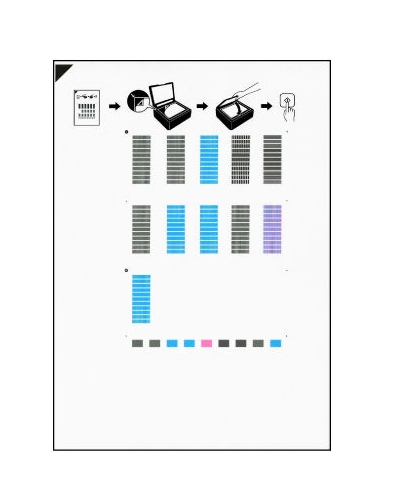
– Place the print head alignment sheet with the printed side facing down and align the mark on the upper left corner of the sheet with the alignment mark.
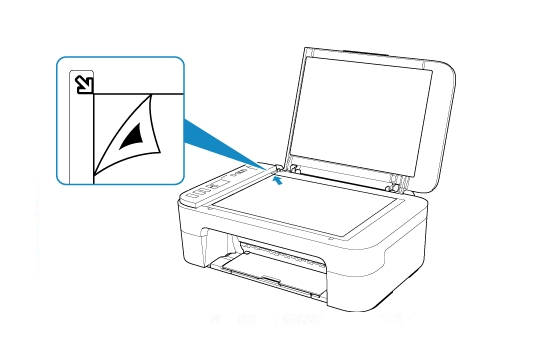
– Close the document cover gently, then press the black button OR the color button.
The printer starts scanning the print head alignment sheet, and the print head position will be adjusted automatically. The print head position adjustment will be complete when the ON lamp lights after flashing. Remove the print head alignment sheet from the scanner glass.
– Discard or recycle the alignment page.
