How to Replace an Empty Ink Cartridge in the HP Deskjet 5740 Series Printer – an Illustrated Tutorial in 10 Steps

Make sure you purchase the right ink cartridges for your specific printer and printer region or have your old ones refilled. Cartridges are not compatible between different brands, and often not within the same brand. HP often designs its inkjet hardware to use country-specific consumables. When you unbox a new HP inkjet printer and set it up, you install a set of ink tanks that ship with the printer. As you turn on the device and get ready to use it, an initialization sequence localizes it to the country associated with the ink cartridges you installed.

HP recommends that you use original HP ink cartridges. XL (Extra Large) cartridges cost more but do provide better value in the long run. They will be able to print at least double the pages of a regular cartridge. Our advice is that if you print often, go with XL. However, ink can dry up. So if you are not a frequent printer, go with the regular cartridges.

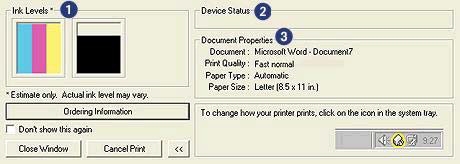
You can check the ink levels by using the software installed with the HP Deskjet. The Device Status window appears each time the printer prints a file. The Ink levels section shows the approximate ink level of each print cartridge.
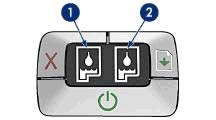
The Print Cartridge Status lights also indicate the status of the print cartridges. The lights are located in the center of the printer’s control panel.

The left status light represents the tri-color print cartridge, which is installed in the left side of the print cartridge cradle.
– The light is on and solid when the tri-color print cartridge is low on ink.
– The light flashes when the tri-color print cartridge needs to be serviced.

The right status light represents the black OR the photo print cartridge. One of these print cartridges is installed in the right side of the print cartridge cradle.
– The light is on and solid when the black or photo print cartridge is low on ink.
– The light flashes when the black OR photo print cartridge needs to be serviced.
Ink level warnings and indicators provide estimates for planning purposes only. You do not have to replace the cartridges until the print quality is unacceptable. You’ll usually install both the black and tri-color cartridges in the Deskjet, but you can use the Ink-backup Printing Mode to operate the HP Deskjet with only one print cartridge. The ink-backup mode is initiated when a print cartridge is removed from the print cartridge cradle. This printing mode lets you print with a single print cartridge, but it slows the product and affects the quality of printouts. We do not recommend using the photo print cartridge for ink-backup mode.

Which ink cartridges do I need for my HP Deskjet 5740 Printer?

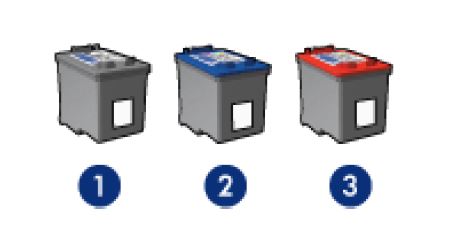
These print cartridges can be used with the printer:
l. black print cartridge
2. tri-color print cartridge
3. photo print cartridge
Everyday printing: Use the black and tri-color print cartridges for everyday print jobs.
– Quality color photos: For more vibrant colors when printing color photographs or other special documents, remove the black print cartridge and use a photo print cartridge in combination with the tri-color print cartridge.

For your US HP Deskjet 5740 Printer you need HP 94 Black OR HP 96 Black cartridges AND HP 95 Tri-color OR HP 97 Tri-color cartridges. Check the price of HP 94 and HP 95 cartridges at Amazon.com .

For printing photos use HP 99 Photo Original cartridges.

For your European or UK HP Deskjet 5740 Printer you need HP 338 Black OR HP 339 Black cartridges AND HP 343 Tri-color OR HP 344 Tri-color cartridges.

For printing photos use HP 348 Photo Original cartridges.

Try Amazon's ink selector tool to find compatible ink cartridges for your printer.

Replace the ink cartridges

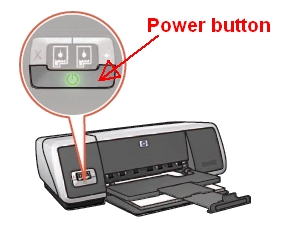
1. Press the Power button to turn on the printer, if it is not already turned on. Wait until the product is idle and silent before continuing.
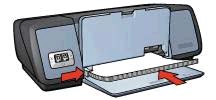
2. Load unused, plain white letter or A4-sized paper in the tray, if you have not already done so.
Remove the empty cartridge
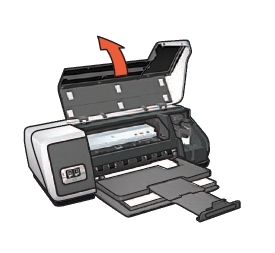
3. Open the printer cover. The carriage moves to the right side of the printer. Wait until the carriage is idle and silent before proceeding.
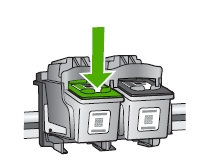
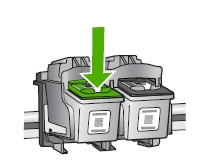
4. Press down on the empty cartridge to release it, and then pull it toward you to remove it from its slot. Remove the cartridge from the slot on the left to replace the tri-color cartridge. Remove the cartridge from the slot on the right to replace the black (OR photo) cartridge.
5. Place the old ink cartridge in an envelope and refer to HP’s recycling instructions at http://www.hp.com/recycle .

Insert a new cartridge
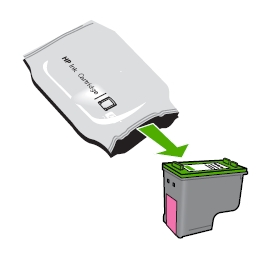
6. Remove the new cartridge from its package. Be careful to touch only the black plastic on the cartridge.

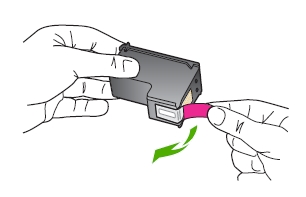
7. Remove the plastic tape using the pull tab.
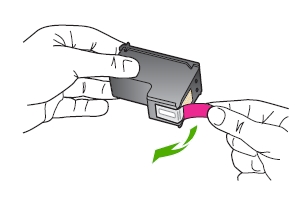


Do NOT:
– Remove the copper electrical strip.
– Touch the copper-colored contacts or the ink nozzles.
– Replace the protective tape on the contacts.
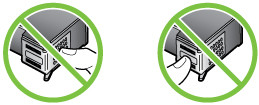
do not touch contacts

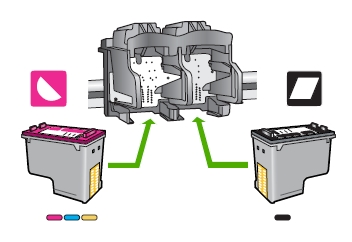
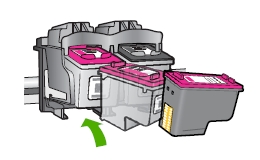
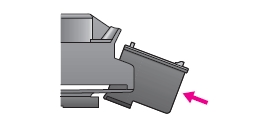
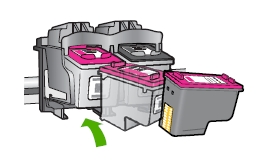
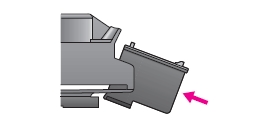
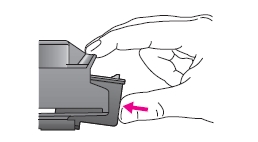
8. Hold the ink cartridge by its sides with the nozzles toward the printer (HP label on top), then insert the ink cartridge into its correct slot. Slide the new ink cartridge at a slight upward angle into the empty slot, and then gently push the ink cartridge until it snaps into place. Repeat these steps to install the other ink cartridge, if necessary. Insert the tri-color ink cartridge into the left slot. Insert the black OR photo ink cartridge into the right slot.
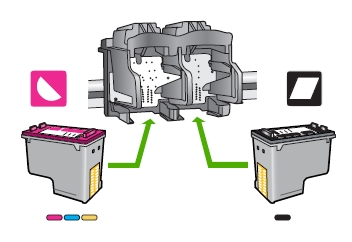
9. Repeat steps 4 through 8 for the other cartridge if needed.

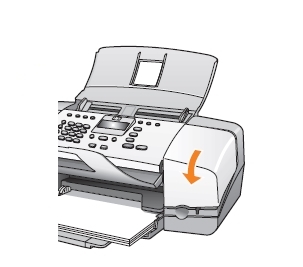
10. Close the printer cover. The printer automatically prints a calibration page.

Align the ink cartridges
The printer automatically aligns the print cartridges after a new print cartridge is installed. You can also align the print cartridges at other times to ensure optimal print quality.
– Open the printer Toolbox.
– Click Align the Printer.
– Click Align, and then follow the onscreen instructions.
– Discard or recycle the alignment page.
How to Replace an Empty Ink Cartridge in the HP OfficeJet 4215 All-in-One Series Printer – an Illustrated Tutorial in 10 Steps

Make sure you purchase the right ink cartridges for your specific printer and printer region or have your old ones refilled. Cartridges are not compatible between different brands, and often not within the same brand. HP often designs its inkjet hardware to use country-specific consumables. When you unbox a new HP inkjet printer and set it up, you install a set of ink tanks that ship with the printer. As you turn on the device and get ready to use it, an initialization sequence localizes it to the country associated with the ink cartridges you installed. HP recommends that you use original HP ink cartridges.

You can easily check the ink supply level to determine how soon you might need to replace a print cartridge. The ink level supply shows an approximation of the amount of ink remaining in the print cartridges. Checking the ink levels can only be done from the HP Director with the HP Officejet turned on and connected. When you first installed the HP Officejet software on your computer during setup, the HP Director was automatically installed on your computer.
– From the HP Director, choose Settings, choose Print Settings, and then choose Printer Toolbox.
– Click the Estimated Ink Levels tab.

Ink level warnings and indicators provide estimates for planning purposes only. When you receive a low-ink warning message, consider having a replacement ink cartridge available to avoid possible printing delays. You do not have to replace the ink cartridges until the print quality is unacceptable. Don’t leave a cartridge slot empty. You must install both print cartridges in order for your HP Officejet to work.

Which ink cartridges do I need for my HP OfficeJet 4215 All-in-One Printer?

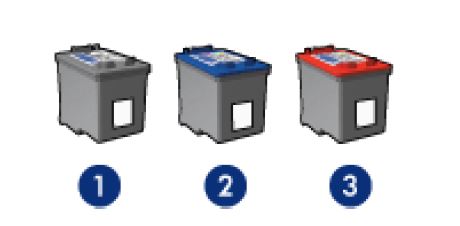
These print cartridges can be used with the printer:
l. black print cartridge
2. tri-color print cartridge
3. photo print cartridge

For your US, European and UK HP OfficeJet 4215 All-in-One Printer you need HP 56 Black AND HP 57 Tri-color cartridges. There are also 2-Packs available, like the HP 56 / 57 Black and Tri-Color Original Value Pack Combo. Check the price of HP 56 and HP 57 cartridges at Amazon.com .

Note: You can also use the cheaper HP 27 Black AND HP 28 Tri-color cartridges for your HP Deskjet 5650, but you’ll have to replace them about twice as fast.

Quality color photos: For more vibrant colors when printing color photographs or other special documents, remove the black print cartridge and install an HP 58 Photo Ink Cartridge.

Try Amazon's ink selector tool to find compatible ink cartridges for your printer.

Replace the ink cartridges

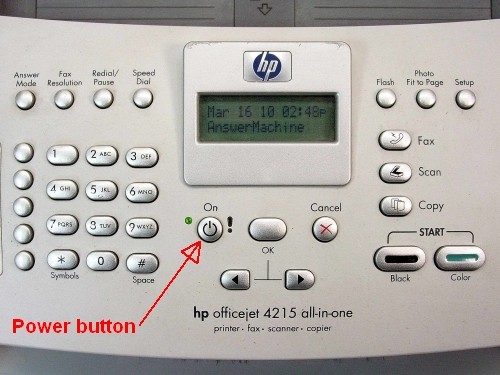
1. Press the power button to turn on the printer, if it is not already on.

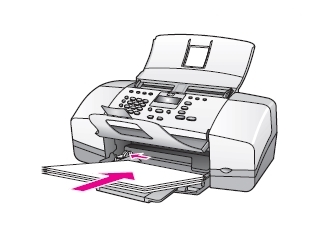
2. Load unused plain Letter or A4 white paper in the input tray.

Remove the old cartridge
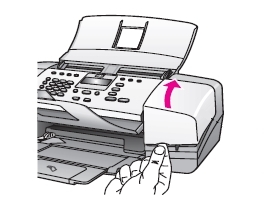
3. Open the print-carriage access door. Wait until the print carriage moves into view and is idle and silent before you continue.

4. Press down on the empty cartridge to release it, and then pull it toward you out its slot. Remove the cartridge from the slot on the left to replace the tri-color cartridge. Remove the cartridge from the slot on the right to replace the black (OR photo) cartridge.

5. Place the old ink cartridge in an envelope and refer to HP’s recycling instructions at http://www.hp.com/recycle .

Insert a new cartridge
6. Remove the new cartridge from its package. Be careful to touch only the black plastic on the cartridge.

7. Remove the plastic tape using the pull tab.


Do NOT:
– Remove the copper electrical strip.
– Touch the copper-colored contacts or the ink nozzles.
– Replace the protective tape on the contacts.
do not touch contacts

8. Hold the ink cartridge by its sides with the nozzles toward the printer (HP label on top), then insert the ink cartridge into its correct slot. Slide the new ink cartridge at a slight upward angle into the empty slot, and then gently push the ink cartridge until it snaps into place. Repeat these steps to install the other ink cartridge, if necessary. Insert the tri-color ink cartridge into the left slot. Insert the black OR photo ink cartridge into the right slot.

9. Repeat steps 4 through 8 for the other cartridge if needed.

10. Close the printer cover. “Press OK to print Align page” appears on the display. Press OK.

Align the ink cartridges
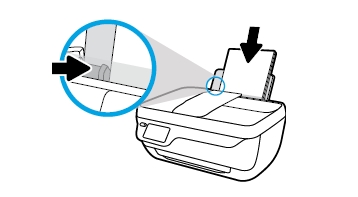
– Remove the alignment page and load the top of the page face down in the document feeder tray between the paper width guides, and press OK.
– When “Alignment Complete” appears on the front panel display, the alignment is complete.
– Discard or recycle the alignment page.
The HP Officejet prompts you to align print cartridges every time you install or replace a print cartridge. You can also align the print cartridges at any time from the front panel or the HP Director. Aligning the print cartridges ensures highquality output. If you remove and reinstall the same print cartridge, the HP Officejet will not prompt you to align the print cartridges.

How to Replace an Empty Ink Cartridge in the HP OfficeJet 3834 All-in-One series Printer – an Illustrated Tutorial in 15 Steps

Make sure you purchase the right ink cartridges for your specific printer and printer region or have your old ones refilled. Cartridges are not compatible between different brands, and often not within the same brand. HP often designs its inkjet hardware to use country-specific consumables. When you unbox a new HP inkjet printer and set it up, you install a set of ink tanks that ship with the printer. As you turn on the device and get ready to use it, an initialization sequence localizes it to the country associated with the ink cartridges you installed. HP recommends that you use original HP ink cartridges. XL (Extra Large) cartridges cost more but do provide better value in the long run. They will be able to print at least double the pages of a regular cartridge. Our advice is that if you print often, go with XL. However, ink can dry up. So if you are not a frequent printer, go with the regular cartridges.

You can check the estimated ink levels from the printer software or from the printer control panel.

To check the estimated ink levels from the printer control panel
– From the Home screen, touch the Ink Icon (see below) to display the estimated ink levels.

To check the estimated ink levels from the HP printer software
– Open the HP printer software.
– In the printer software, click the Estimated Ink Levels tab.

Ink level warnings and indicators provide estimates for planning purposes only. When you receive a low-ink warning message, consider having a replacement ink cartridge available to avoid possible printing delays. You do not have to replace the ink cartridges until the print quality is unacceptable. You’ll usually install both the black and tri-color cartridges in the HP Officejet, but you can also leave one ink cartridge carriage empty (single-cartridge mode).

Which ink cartridges do I need for my HP OfficeJet 3834 All-in-One Printer?

For your US HP OfficeJet 3834 All-in-One Printer you need
HP 63 OR HP 63XL cartridges. Check the price of HP 63 cartridges at Amazon.com .
For your European or UK HP OfficeJet 3834 All-in-One Printer you need HP 302 or HP 302XL cartridges.

Try Amazon's ink selector tool to find compatible ink cartridges for your printer.

Replace the ink cartridges

1. Press the power button to turn on the printer, if it is not already on. It may take a few seconds for the printer to turn on after pressing the power button.

2. Load unused, plain white letter or A4-sized paper in the tray, if you have not already done so.

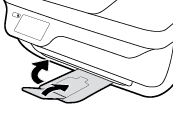
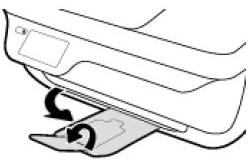
3. Close the output tray extender, and then rotate the output tray clockwise to stow it in the printer.

Remove the empty cartridge
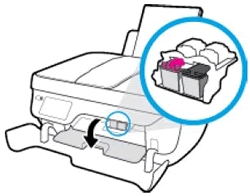
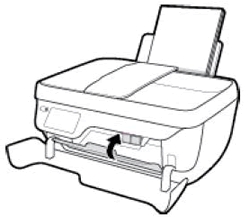
4. Open the front door of the printer.

5. Open the cartridge access door and wait for the print carriage to move to the center of the printer. Wait until the carriage is idle and silent before you continue.

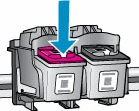
6. Press down to release the ink cartridge, and then remove it from the slot.

Insert the new cartridge
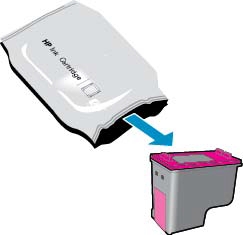
7. Remove the new ink cartridge from its packaging.

8. Remove the plastic tape using the pull tab.


Do NOT:
– Remove the copper electrical strip.
– Touch the copper-colored contacts or the ink nozzles.
– Replace the protective tape on the contacts.
do not touch contacts

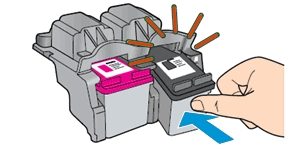
9. Hold the ink cartridge by its sides with the nozzles toward the printer, and then insert the new ink cartridge into its slot. Push the ink cartridge forward into its slot until it snaps into place. Repeat these steps to replace the other ink cartridge, if necessary. Make sure the ink cartridge is inserted in the correct slot.

– The tri-color ink cartridge goes in the slot on the left.
– The black ink cartridge goes in the slot on the right.

10. Close the ink cartridge access door.

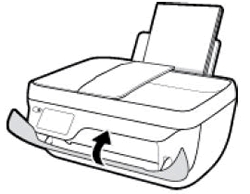
11. Close the front door of the printer.

12. Pull out the output tray, and then lift the output tray extender.

Align the ink cartridges
13. Press OK to align the ink cartridges. An alignment page prints. Scanning the alignment page allows the printer to align the ink cartridges and provide the best print quality.

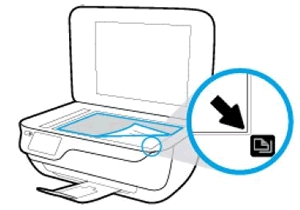
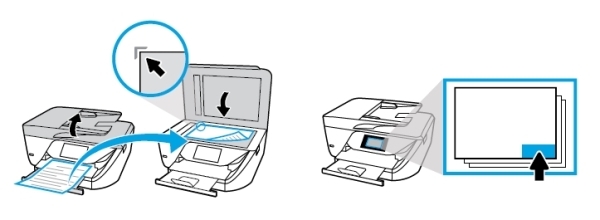
14. Lift the scanner lid. Place the alignment page with the print side down on the scanner glass, and then position it according to the engraved guides around the glass.

15. Close the scanner lid and touch OK to scan the page and complete the ink cartridge alignment.

The alignment page did not print?
If the alignment page did not print automatically, you can align the cartridges manually from the printer software and from the printer display on the product.

To align the cartridges or printhead from the printer software (Windows):
Open the HP printer software.
– In the printer software, click Print, Scan & Fax > Maintain Your Printer to access the Printer Toolbox window.
– From the Device Services tab, click Align Ink Cartridges. The printer prints an alignment sheet.
– Now go to step 14.

To align the cartridges or printhead from the printer control panel:
– On the printer control panel, from the Home screen, touch Setup.
– Touch Tools.
– Touch Align Printer.
– Now go to step 14.

How to Replace an Empty Ink Cartridge in the HP OfficeJet Pro 6975 All-in-One series – an Illustrated Tutorial in 9 Steps

Make sure you purchase the right ink cartridges for your specific printer and printer region or have your old ones refilled. Cartridges are not compatible between different brands, and often not within the same brand. HP often designs its inkjet hardware to use country-specific consumables. When you unbox a new HP inkjet printer and set it up, you install a set of ink tanks that ship with the printer. As you turn on the device and get ready to use it, an initialization sequence localizes it to the country associated with the ink cartridges you installed.

HP recommends that you use original HP ink cartridges. XL (Extra Large) cartridges cost more but do provide better value in the long run. They will be able to print at least double the pages of a regular cartridge. Our advice is that if you print often, go with XL. However, ink can dry up. So if you are not a frequent printer, go with the regular cartridges.

You can check the estimated ink levels from the printer control panel or from the printer software. Ink level warnings and indicators provide estimates for planning purposes only. When you receive a low-ink warning message, consider having a replacement cartridge available to avoid possible printing delays. You do not have to replace the cartridges until prompted to do so.

To check the estimated ink levels from the printer control panel:
From the printer control panel, touch or swipe down the tab at the top of the screen to open the Dashboard, and then touch the ink icon to check the estimated ink levels.

Which ink cartridges do I need for my HP OfficeJet Pro 6975 printer?

For your US HP OfficeJet Pro 6975 All-in-One printer you need 1 HP 902 Black OR HP 906XL cartridge AND 3 color cartridges: HP 902 Cyan/Magenta/Yellow cartridges. There are also Combo Packs (4 cartridges in one pack) available, like the HP 902XL Black and Cyan/Magenta/Yellow. Check the price of HP 902 cartridges at Amazon.com .

For your European or UK HP OfficeJet Pro 6975 All-in-One printer you need 1 HP 903 Black OR HP 907XL cartridge AND 3 color cartridges: HP 903 Cyan + HP 903 Magenta + HP 903 Yellow cartridges.

Try Amazon's ink selector tool to find compatible ink cartridges for your printer.

Replace the ink cartridges.

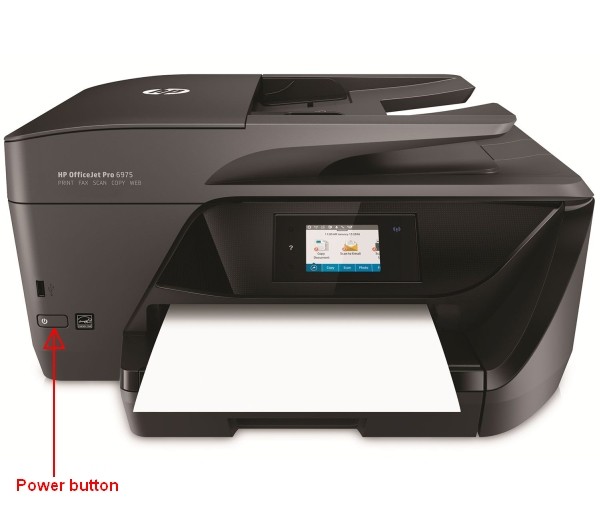
1. Check that power is on. If the product is off, press the Power button to turn on the product. Wait until the product is idle and silent before continuing.

Remove the old cartridge
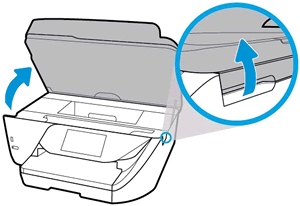
2. Open the cartridge access door.
Locate the two slots on the sides of the printer. Place your fingers in the slots, and then lift to open the ink cartridge access door. Wait until the carriage is idle and silent before you proceed.

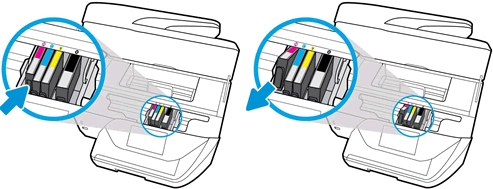
3. Press the tab on the front of the cartridge inward to release it, and then pull up on the cartridge to remove it from the slot.

Insert the new cartridge
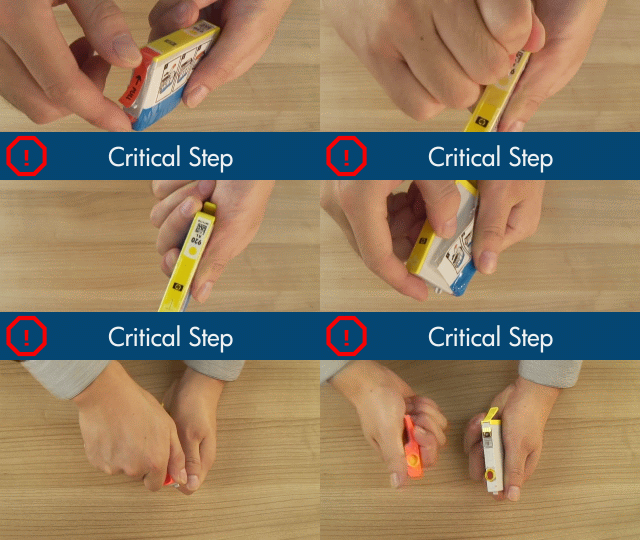
4. Remove the new ink cartridge from its packaging by pulling the orange pull-tab straight back to remove the plastic wrap from the ink cartridge. Make sure you remove the orange pull-tab completely. When you remove the plastic wrap, the paper label on the top of the cartridge tears slightly, which is necessary to vent the cartridge. Do not touch the copper-colored electrical contacts and ink port.

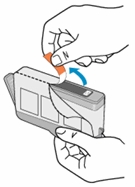
5. Remove the orange cap from the cartridge. Twist the cap counter-clockwise until it snaps off. A forceful twist may be required to remove the cap.

hp cartridge01

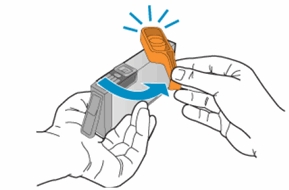
6. Gently bend the tab away from the ink cartridge.

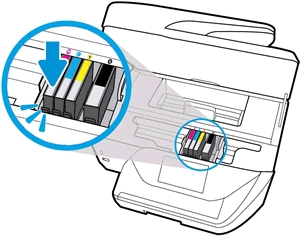
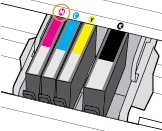
7. Hold the ink cartridge so that the ink cartridge contacts are facing down and toward the printer. Match the colored dot on the ink cartridge with the dot of the same color on the carriage. Slide the new ink cartridge into its slot, and then gently press the ink cartridge down until it clicks into place and is seated firmly in the slot. Make sure that the color-coded letter on the cartridge matches that on the slot.
8. Repeat step 3 through 7 for each ink cartridge you are replacing.

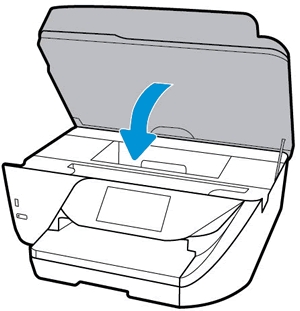
9. Close the cartridge access door.

Align the printhead only if necessary.
The printer automatically aligns the printhead during the initial setup. However, you might want to use this feature for print quality issues in printouts where straight lines look wavy or jagged. You can align the printhead from the printer control panel, from the HP printer software and from the embedded web server (EWS).