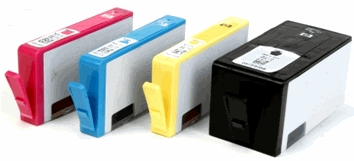
Make sure you purchase the right ink cartridges for your specific printer. Cartridges are not compatible between different brands, and often not within the same brand. HP recommends that you use original HP ink cartridges. XL (Extra Large) cartridges cost more but do provide better value in the long run. They will be able to print at least double the pages of a regular cartridge. Our advice is that if you print often, go with XL. However, ink can dry up. So if you are not a frequent printer, go with the regular cartridges.
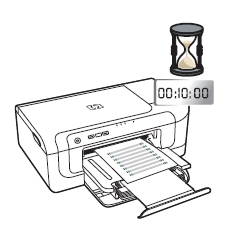
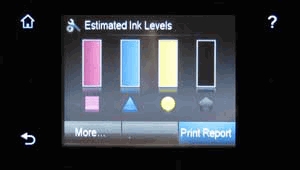
You can check the estimated ink levels from the HP Solution Center, Toolbox (Windows), the HP Utility (Mac OS X), or the embedded Web server. Ink level alerts and indicators provide estimates for planning purposes only. When you receive a low-ink alert, consider having a replacement cartridge available to avoid possible printing delays. You do not have to replace the cartridges until the print quality is unacceptable.
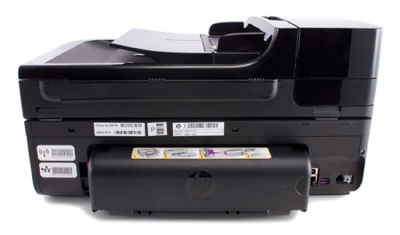
Which ink cartridges do I need for my HP Officejet 6000 Printer?

 For your US HP Officejet 6000 Printer you need HP 920 Black AND HP 920 Cyan/Magenta/Yellow cartridges. There are also Combo Packs (4 cartridges in one pack) available, like the HP 920XL Black and 920 Cyan/Magenta/Yellow Ink Cartridges With Media Kit Combo Pack. Check the price of HP 920 cartridges at Amazon.com .

 For your European and UK HP Officejet 6000 Printer you need HP 920 Black and HP 920 Cyan/Magenta/Yellow cartridges. There are also Combo Packs (4 cartridges in one pack) available, like the HP 920XL 4-pack High Yield Black/Cyan/Magenta/Yellow Original Ink Cartridges Combo Pack.
Try Amazon's ink selector tool to find compatible ink cartridges for your printer.
Replace the ink cartridges
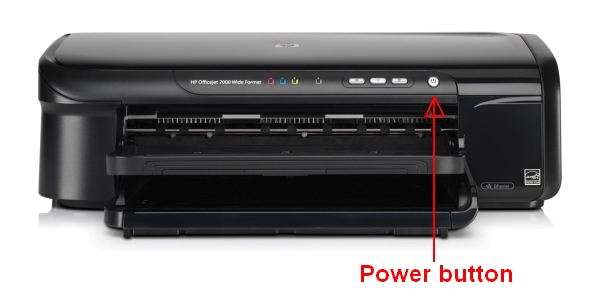
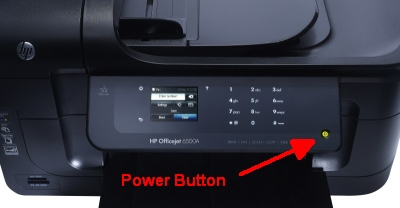
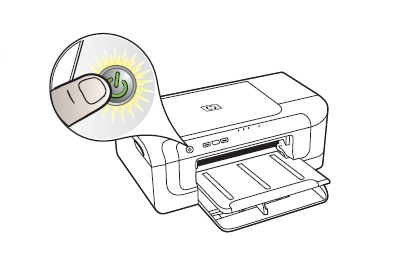
1. Press the Power button to turn on the printer, if it is not already turned on. It can take a few seconds for the printer to turn on after you press the Power button. Wait until the product is idle and silent before continuing.
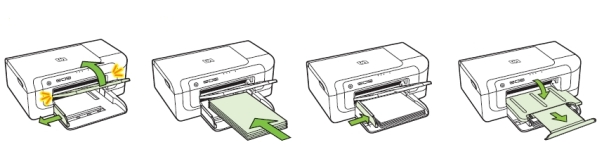
2. Load unused, plain white letter or A4-sized paper in the tray, if you have not already done so.
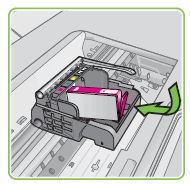
Remove the old cartridge
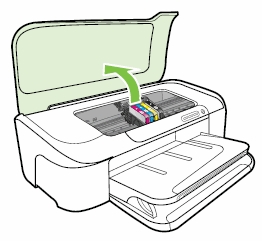
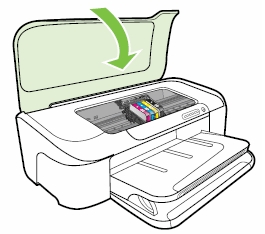
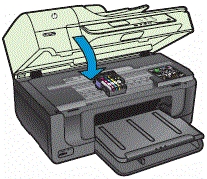
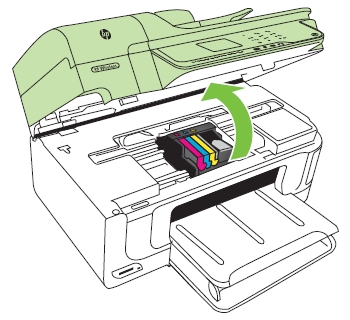
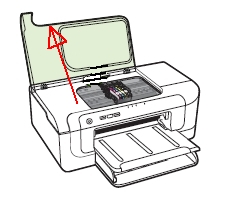
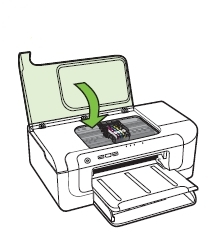
3. Open the top cover. The carriage moves to the center of the printer. Wait several seconds until the carriage is idle and silent before you proceed.
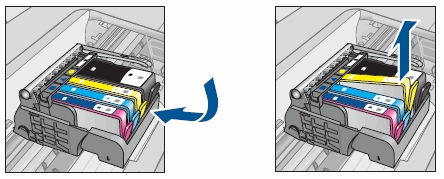
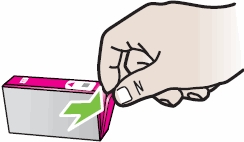
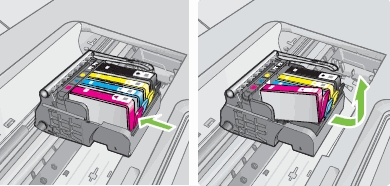
4. Press in the tab on the front of the cartridge to release it, and then pull it up and out to remove it from its slot. Do NOT lift the latch handle on the print carriage to install the ink cartridges. Doing so can result in incorrectly seated ink cartridges and printing problems. The latch must remain down in order to correctly install the ink cartridges.
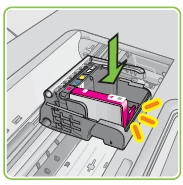
Insert a new cartridge
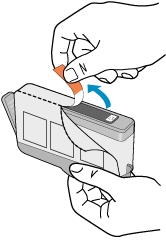
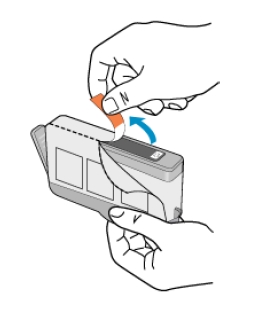
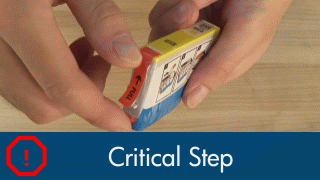
5. Remove the new ink cartridge from its packaging by pulling the orange pull-tab straight back to remove the plastic wrap from the ink cartridge. Make sure that you remove the orange pull-tab completely otherwise, ink might leak from the cartridge. When you remove the plastic wrap, the paper label on the top of the cartridge tears slightly, which is necessary to properly vent the cartridge.
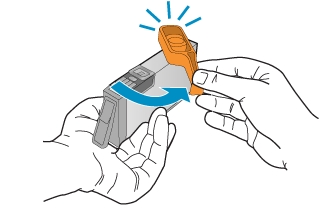
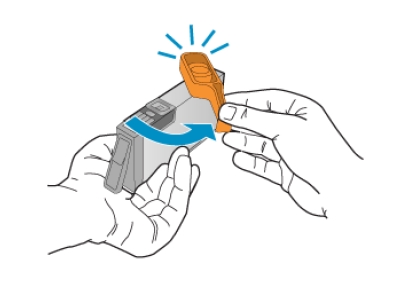
6. Hold the cartridge by its sides, and then twist the protective orange cap counter-clockwise to snap it off the cartridge. Make sure the plastic tab is entirely removed. Do not touch the copper-colored contacts or the ink nozzles. Touching these parts can result in clogs, ink failure, and bad electrical connections.
7. With the cartridge contacts facing the printhead, slide the cartridge into the correct slot. Make sure that you insert the ink cartridge into the slot that has the same shaped icon and color as the one you are installing. Press down on the cartridge until it clicks into place and is seated firmly in the slot.


If the cartridge does not snap into place, remove the cartridge from the carriage. Gently bend the tab away from the cartridge, and then reinsert the cartridge into the carriage.
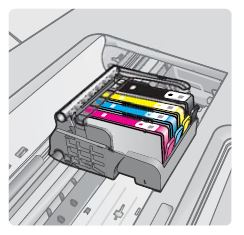
8. Repeat steps 4 through 7 for each ink cartridge that you want to replace.
9. Close the ink cartridge access door. Wait until the printer is idle and silent before you proceed.
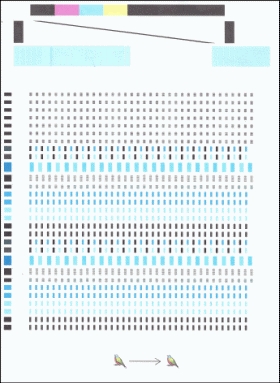
Align the printhead only if necessary.
The printer automatically aligns the printhead during the initial setup. You might want to use this feature when the printer status page shows streaking or white lines through any of the blocks of color or if you are having print quality issues with your printouts. You can align the printhead from the printer’s control panel, from the Toolbox (Windows) or HP Utility (OS X), and from the embedded web server (EWS).
A. To align the printhead from the control panel.
– Press and hold the Power button > press the Resume button three times, and release the Power button.
B. To align the printer from the Printer Toolbox.
– In the HP Solution Center, click Settings.
– In the Print Settings area, click Printer Toolbox.
– Click the Device Services tab.
– Click Align the Printer.
C. To align the printhead from the embedded Web server.
– Click the Settings tab, click Device Services in the left pane, select Align Printer from the drop-down list in the Print Quality section, and then click Run Diagnostic.
The product prints a test page, aligns the printhead, and calibrates the printer. Recycle or discard the page.