Make sure you purchase the right ink cartridges for your specific printer and printer region or have your old ones refilled. Cartridges are not compatible between different brands, and often not within the same brand. HP often designs its inkjet hardware to use country-specific consumables. When you unbox a new HP inkjet printer and set it up, you install a set of ink tanks that ship with the printer. As you turn on the device and get ready to use it, an initialization sequence localizes it to the country associated with the ink cartridges you installed.
HP recommends that you use original HP ink cartridges. XL (Extra Large) cartridges cost more but do provide better value in the long run. They will be able to print at least double the pages of a regular cartridge. Our advice is that if you print often, go with XL. However, ink can dry up. So if you are not a frequent printer, go with the regular cartridges.
Ink level warnings and indicators provide estimates for planning purposes only. When you receive a low-ink warning message, consider having a replacement cartridge available to avoid possible printing delays. You do not have to replace the cartridges until the print quality is unacceptable. You’ll usually install both the black and tri-color cartridges in the HP Deskjet, however, you can use the single-cartridge mode to operate the HP All-in-One with only one print cartridge. The single-cartridge mode is initiated when a print cartridge is removed from the ink cartridge carriage. During single-cartridge mode, the printer can copy documents, copy photos, and print jobs from the computer.
Which ink cartridges do I need for my HP Deskjet 2543 Printer?
 For your US HP Deskjet 2548 Printer you need
HP 61 OR HP 61XL cartridges. Check the price of HP 61 cartridges at Amazon.com .
There are also Combo Packs (2 cartridges in one pack) available, like the HP 61 Black and Tri-color Original Ink Cartridges, 2 Cartridges.

 For your European or UK HP Deskjet 2548 Printer you need HP 301 or HP 301XL cartridges.
There are also Combo Packs (2 cartridges in one pack) available, like the HP 301 Pack of 2 Cartridges – 1 Black Ink and 1 of Three Colors (Genuine Cyan, Magenta, Yellow).
Try Amazon's ink selector tool to find compatible ink cartridges for your printer.
Replace the ink cartridges
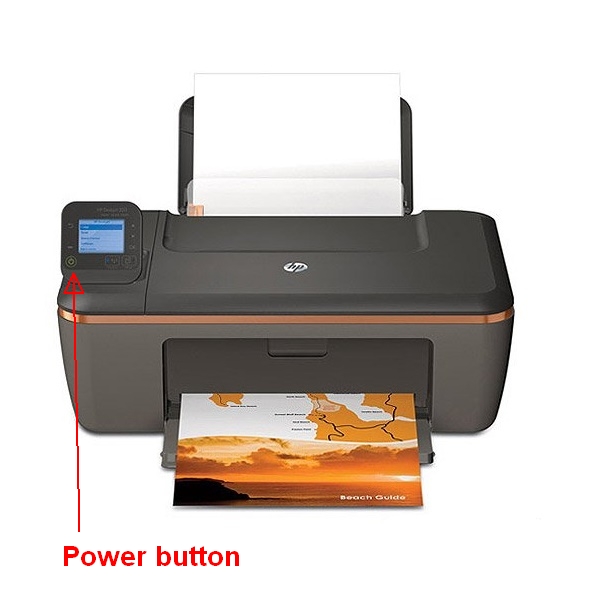
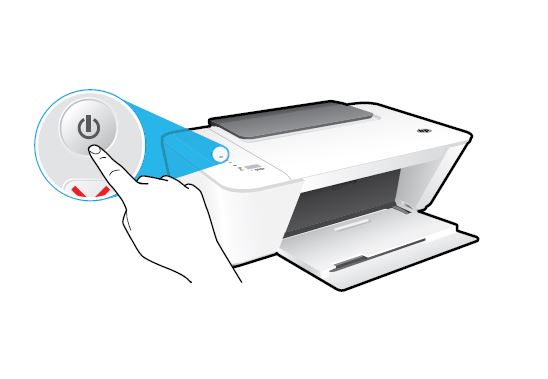
1. Press the Power button to turn on the printer, if it is not already turned on. Wait until the product is idle and silent before continuing.
2. Load unused, plain white letter or A4-sized paper in the tray, if you have not already done so.

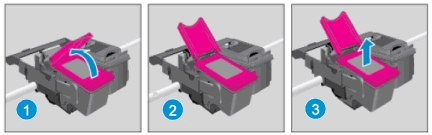
Remove the empty cartridge
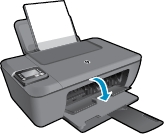
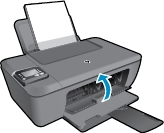
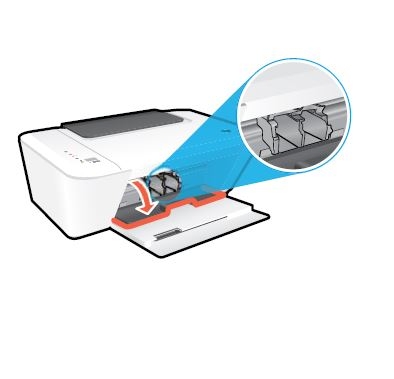
3. Open the cartridge access door. The carriage moves to the center of the printer. Wait until the carriage is idle and silent before proceeding.
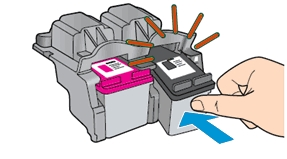
4. Press down on the cartridge to release it, and then pull it toward you out its slot. Remove the cartridge from the slot on the left to replace the color cartridge. Remove the cartridge from the slot on the right to replace the black cartridge.

Insert the new cartridge
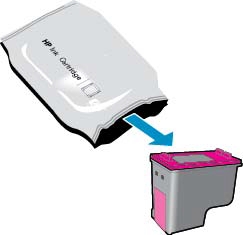
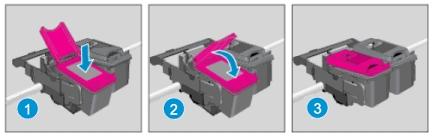
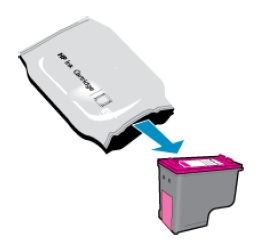
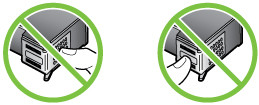
5. Remove the new cartridge from its packaging. Be careful to touch only the black plastic.

Do NOT:
– Remove the copper electrical strip.
– Touch the copper-colored contacts or the ink nozzles.
– Replace the protective tape on the contacts.
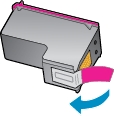
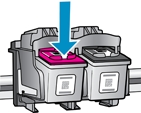
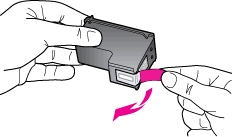
6. Gently remove the plastic tape on the cartridge by pulling the colored pull tab.
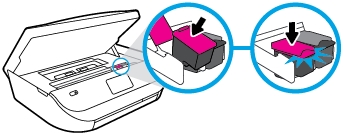
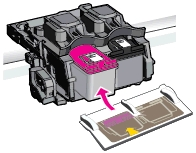
7. Hold the cartridge by its sides with the nozzles toward the printer, and then insert the cartridge into its slot. Make sure that the cartridge is inserted in the correct slot. The tri-color cartridge goes in the slot on the left. The black cartridge goes in the slot on the right. Push the cartridge forward into its slot until it snaps into place.

8. Repeat step 4 through 7 to replace the other cartridge, if necessary.
9. Close the cartridge access door. Follow any prompts on the screen.

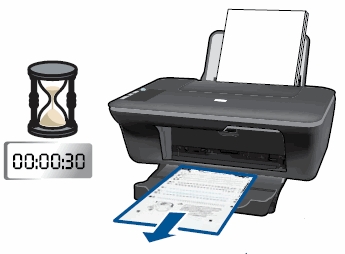
10. Wait about 30 seconds for the alignment page to automatically print. The printer prints an alignment page automatically only when a new cartridge has been installed.

Align the printer
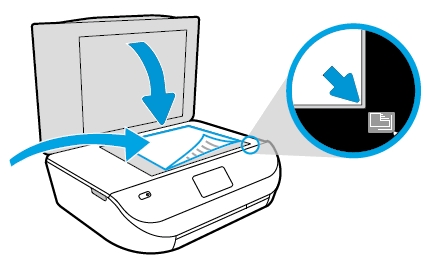
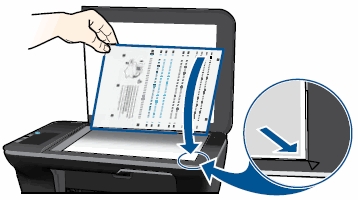
11. Lift the scanner lid.
12. Place the alignment page with the printed-side down on the right-front corner of the scanner glass. See the engraved guide next to the scanner glass for help loading the alignment page.

13. Close the scanner lid.
14. Press the Start Copy Black button on the front panel of the printer. The printer aligns the cartridges.
15. Remove the alignment page from the scanner glass, and then close the scanner lid. Discard or recycle the alignment page.
The alignment page did not print?
– In the printer software, click Print & Scan and then click Maintain Your Printer to access the printer toolbox. The printer toolbox appears.
– Click Align Ink Cartridges on the Device Services tab.
The printer prints an alignment sheet.
– Now go back to step 11.